Adding a Project on the website.
Navigate inside the OSAVC git repo which we have cloned
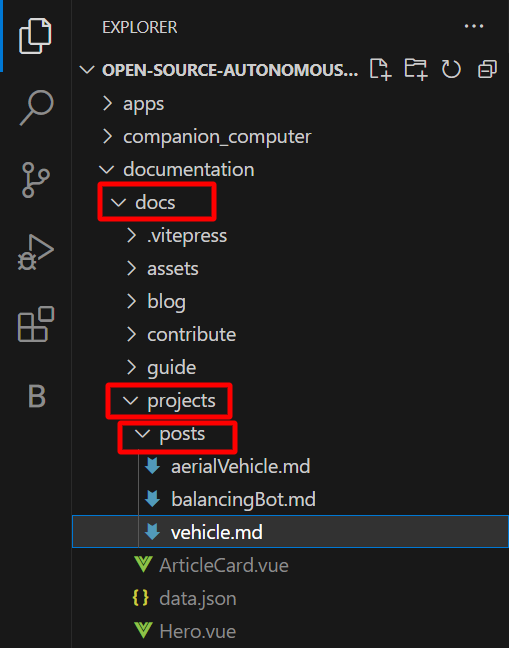
documentation -> docs -> projects -> posts
.
├─ docs              <---
│  ├─ .vitepress
│  │  └─ config.js
│  ├─ about
│  ├─ assets
│  ├─ blog
│  └─ contribute
│  └─ guide
│  └─ projects       <---
│  |  └─ posts       <---
│  └─ index.md
└─ package.json
Inside the folder create your Markdown file in format name.md.
example : Vehicle.md
if you are using a IDE like VsCode you can see the file structure as shown below.

Inside the vehicle.md you can write the details of your project using Markdown language.
# Name of your Project

> Short description of your project.

## Detailed Explanation of the project
Now we have successfully completed creating the md file for our Project.
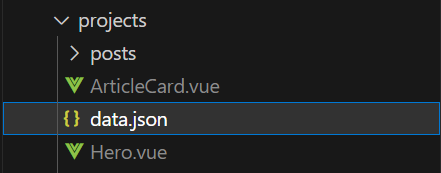
Now for listing it on our website we need to add the data of our project to the data.json file which you can find inside the projects folder.

The data.json file will contain information like
[
  {
    "author": "Author Name",
    "image": "Link of the image you want to add on the ArticleCard", // this image has to be hosted online in png format
    // eg: https://i.ibb.co/3Tjw3gv/OSAVC-BOARD.png
    // This Link has the OSAVC Image hosted online
    "title": "Title of your Project",
    "path": "./posts/post1",  // relative path to your md file
    "excerpt": "Short description to your project which you want to show to the user on the home page of Projects"
  },
]
You have to add different section for your project in the above given format.
This will add your Project as a ArticleCard on the Projects home page.
You can always view the project on the website by hosting it locally by running the docs:dev script which will start a local dev server with instant hot updates.
Run the following command on your terminal.
npm run docs:devpnpm run docs:devyarn docs:devThe dev server should be running at http://localhost:5173. Visit the URL in your browser to see your changes in action!
The Projects section should now contain your project as shown below.
