Companion Computers
Hardware
Required materials
- Raspberry Pi
- Rpi 4 Model B 8GB RAM
- Power supply: Raspberry Pi 15W USB-C Power Supply
- PC with microSD card slot
- MicroSD card
- SanDisk 64GB Ultra MicroSDXC
Software
Imaging in Headless Mode
- Insert the microSD card into the PC
- Open the Raspberry Pi Imager
- Select the Raspberry Pi OS (64-bit) as the Operating System
- Select the microSD card as the Storage
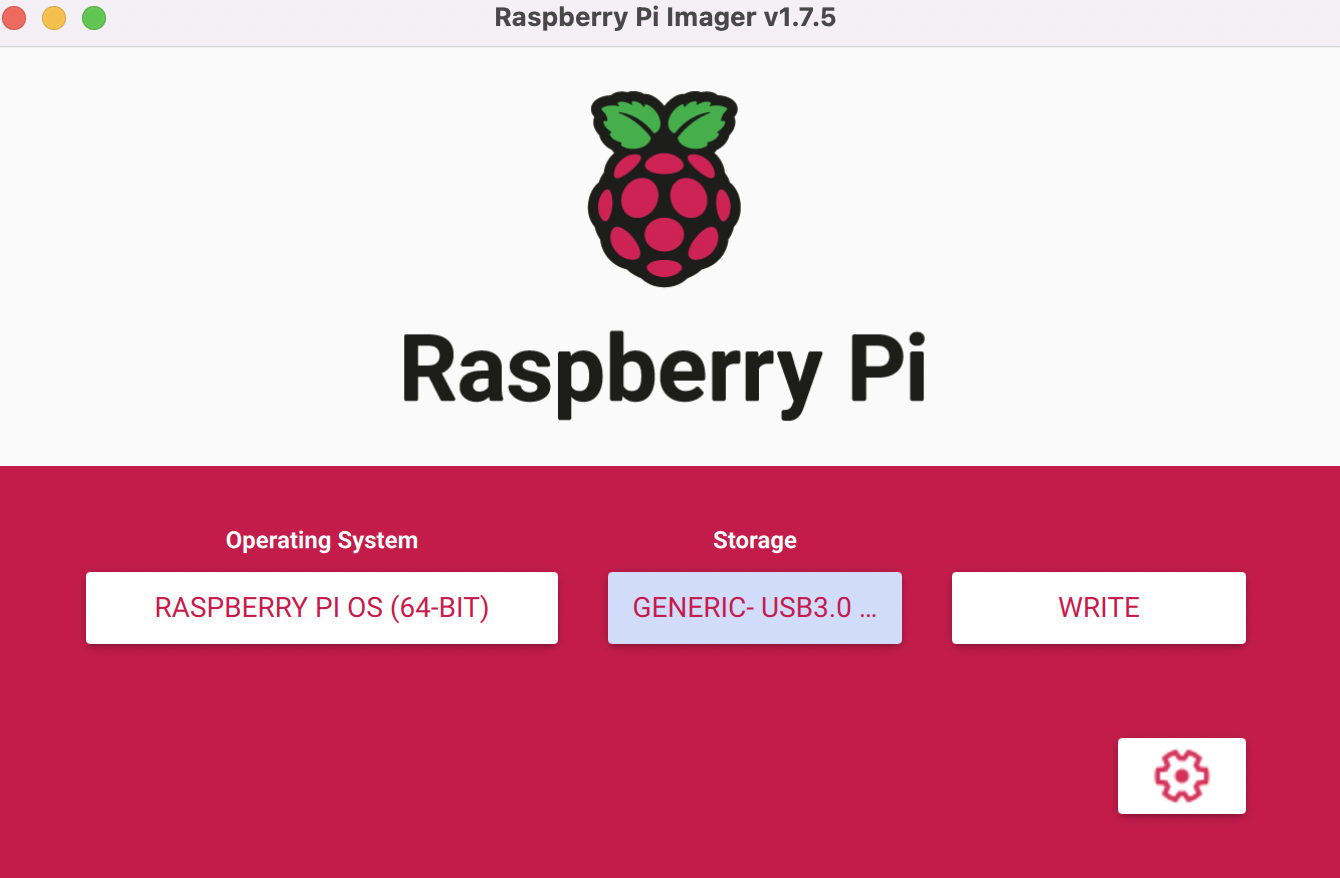
- Click on the gear icon in the bottom right hand corner to access the Advanced options
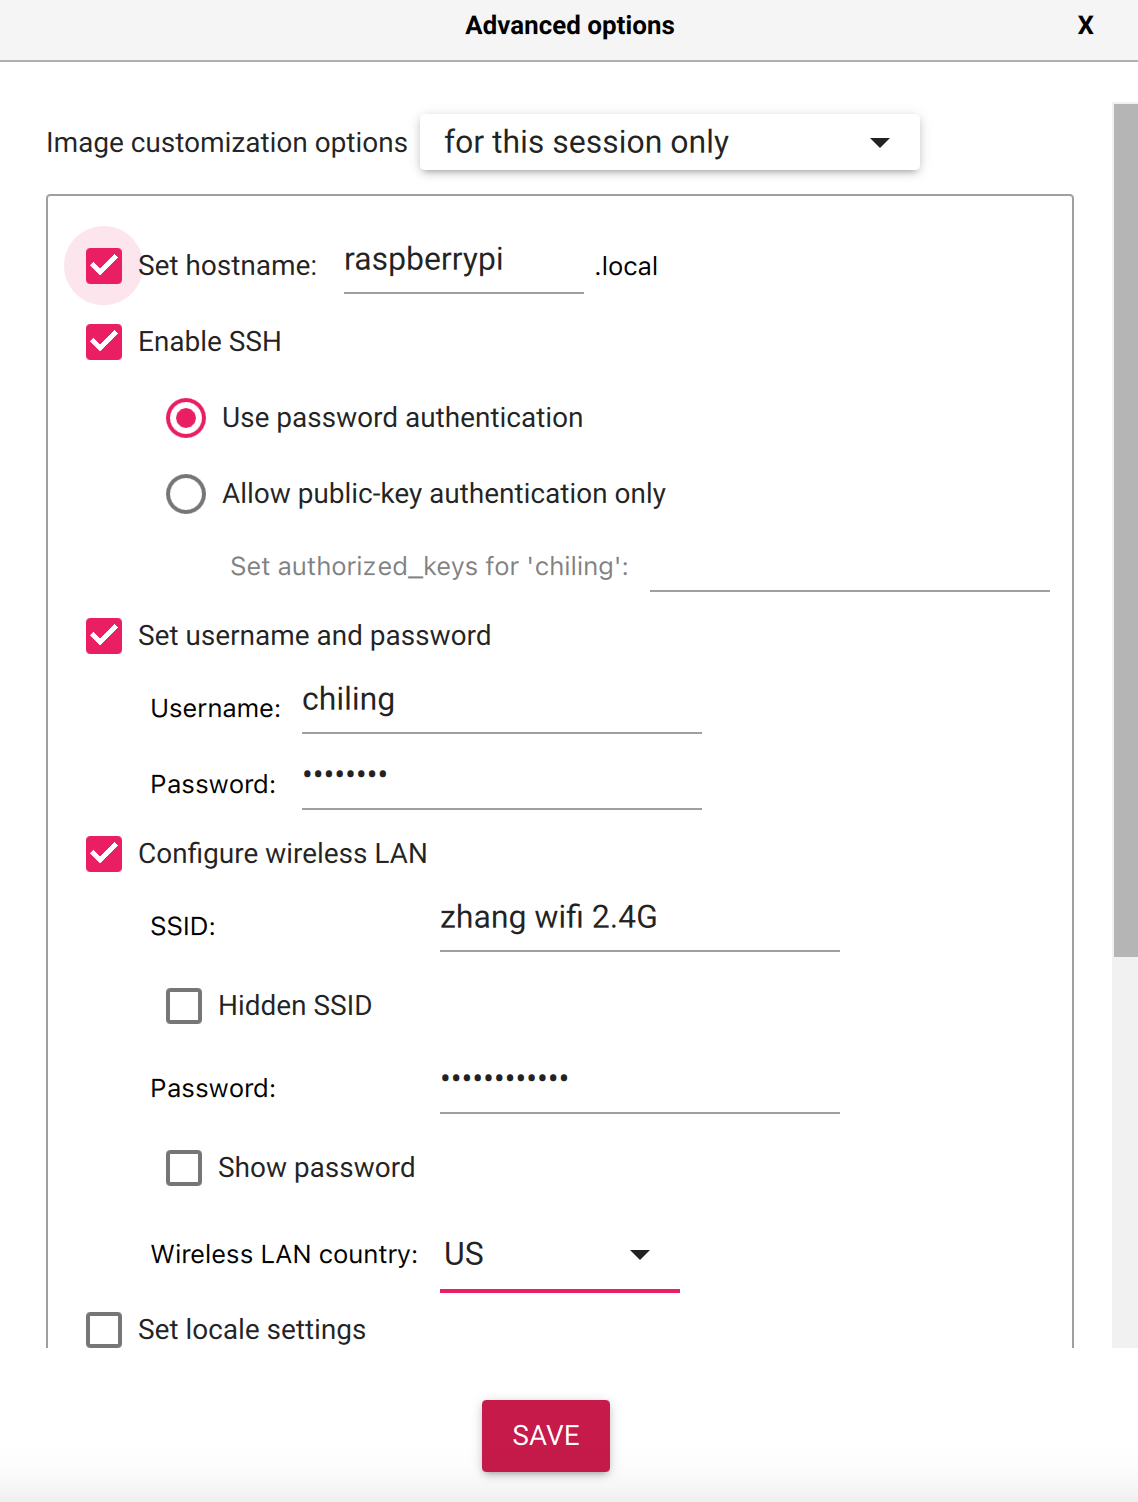
- Select Set hostname: raspberrypi.local
- Select Enable SSH and Use password authentication
- Select Set username and password
- Type the username and password of your choice
- Select Configure wireless LAN
- Type your wifi network name as the SSID and your wifi network password as the Password
- Find your country’s two-letter country code
- Click Save
- Now, Click Write
OSAVC
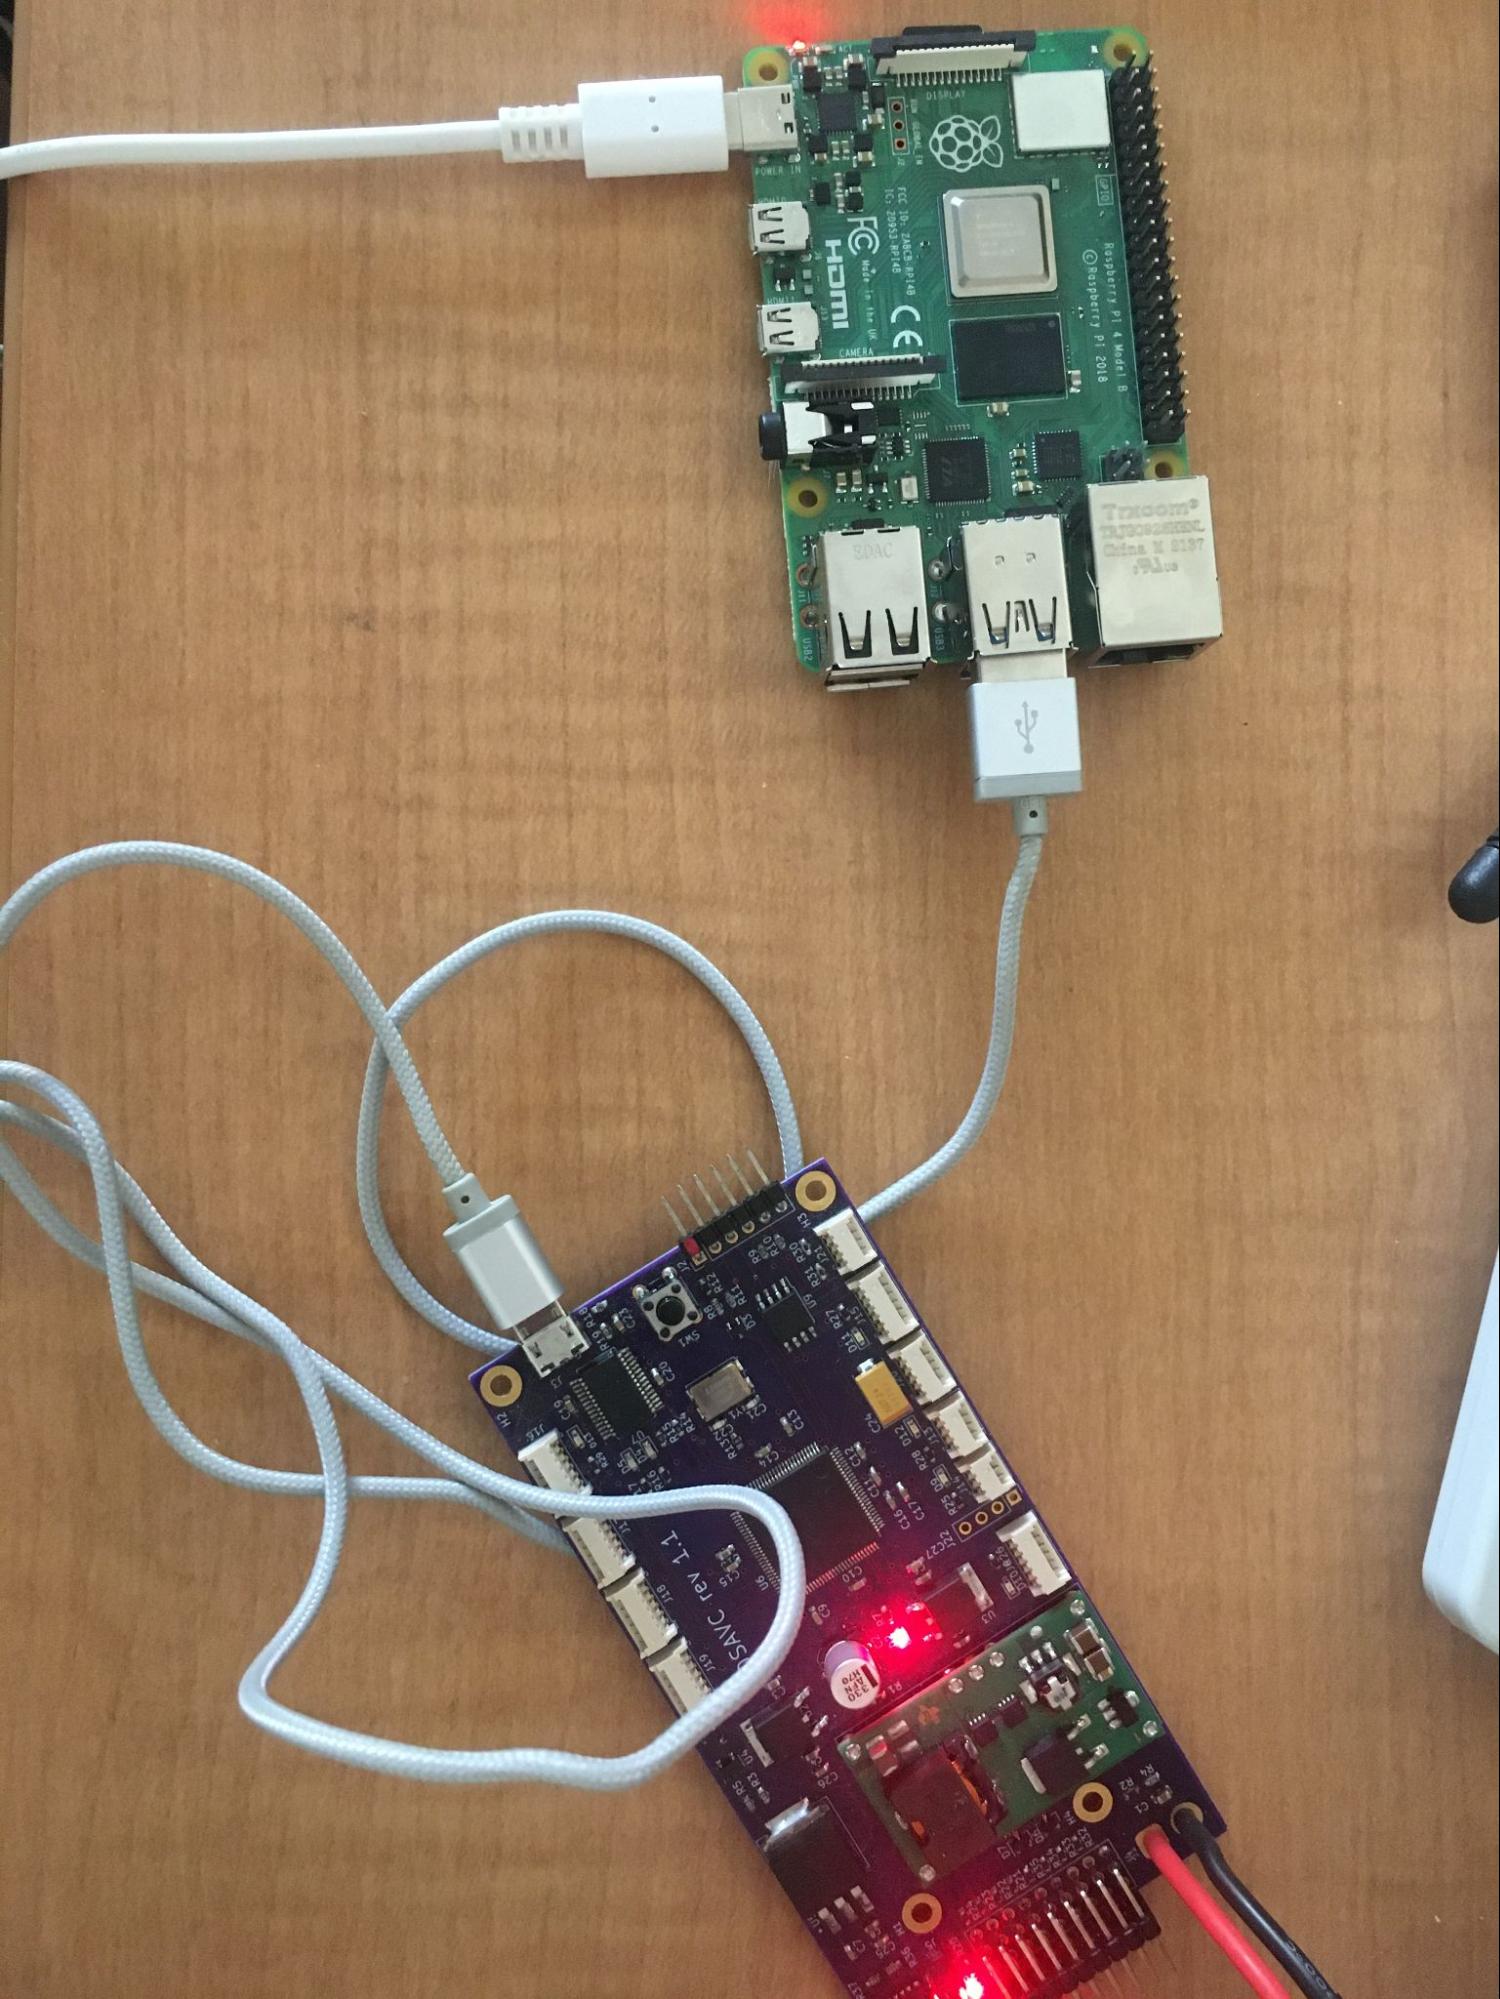
- Connect the OSAVC and PICkit3 Debugger to your PC
- Load TestHarness.X’s code onto the OSAVC
- Open the TestHarness.X folder
- Click Make and Program Device

Raspberry Pi 4
- Insert the microSD card into the Raspberry Pi 4
- Connect the micro-USB port of the OSAVC to the USB port of the Raspberry Pi 4
- Power the Raspberry Pi 4 using the USB-C port with the power supply
- Open an SSH tunnel from your PC to the Raspberry Pi 4 by typing ssh [username]@[hostname].local in your PC terminal
- sudo raspi-config
- Select 5 Interfacing Options
- Select P3 VNC
- Click Yes to enabling the VNC server
- Save your changes
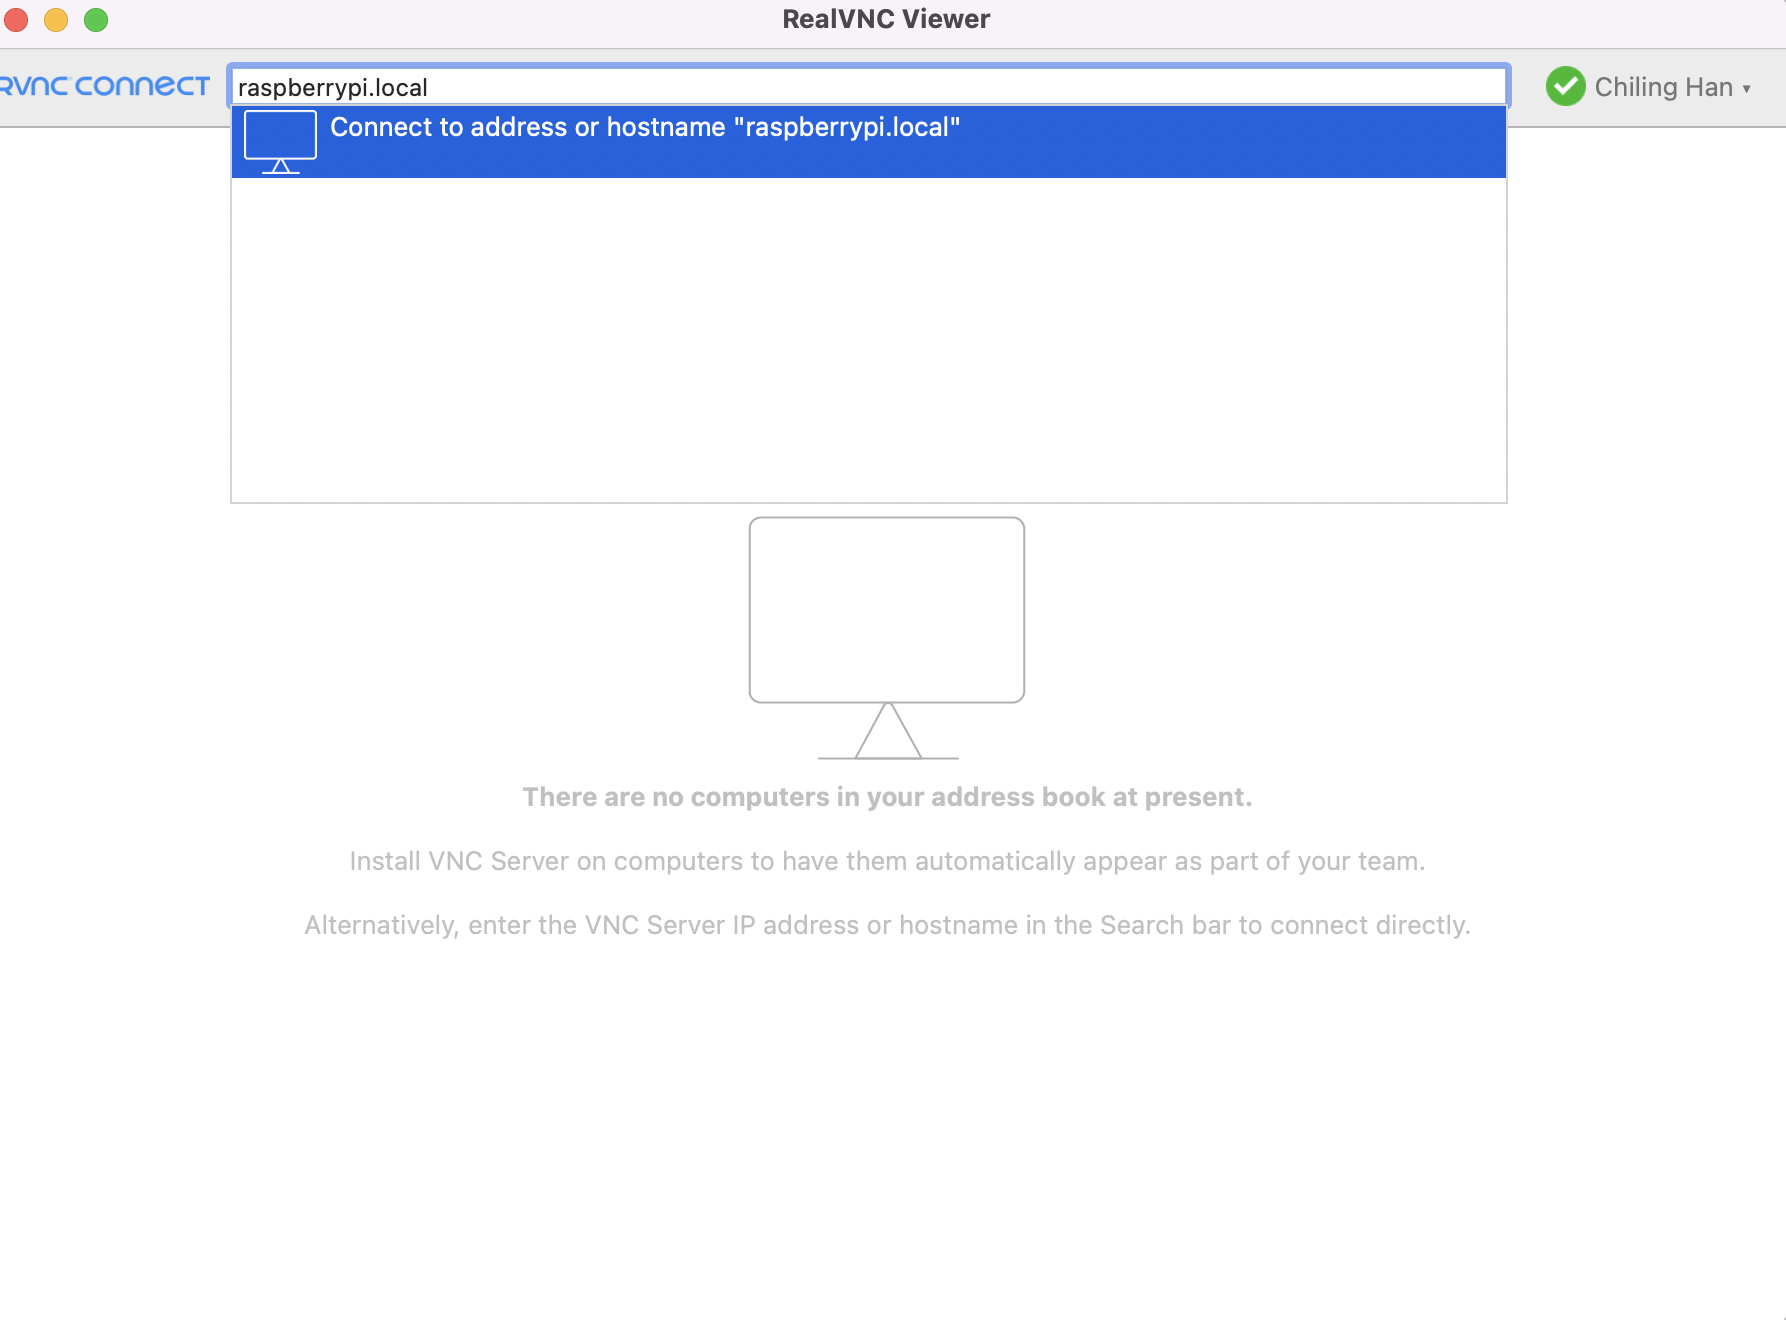
- Open VNC Viewer and connect to [hostname].local at the top
- Install opencv and its dependencies
- sudo apt-get update
- sudo apt install python3-opencv
- Install pymavlink
- sudo pip3 install pymavlink
- Install a serial terminal on the Raspberry Pi 4
- sudo apt-get install minicom
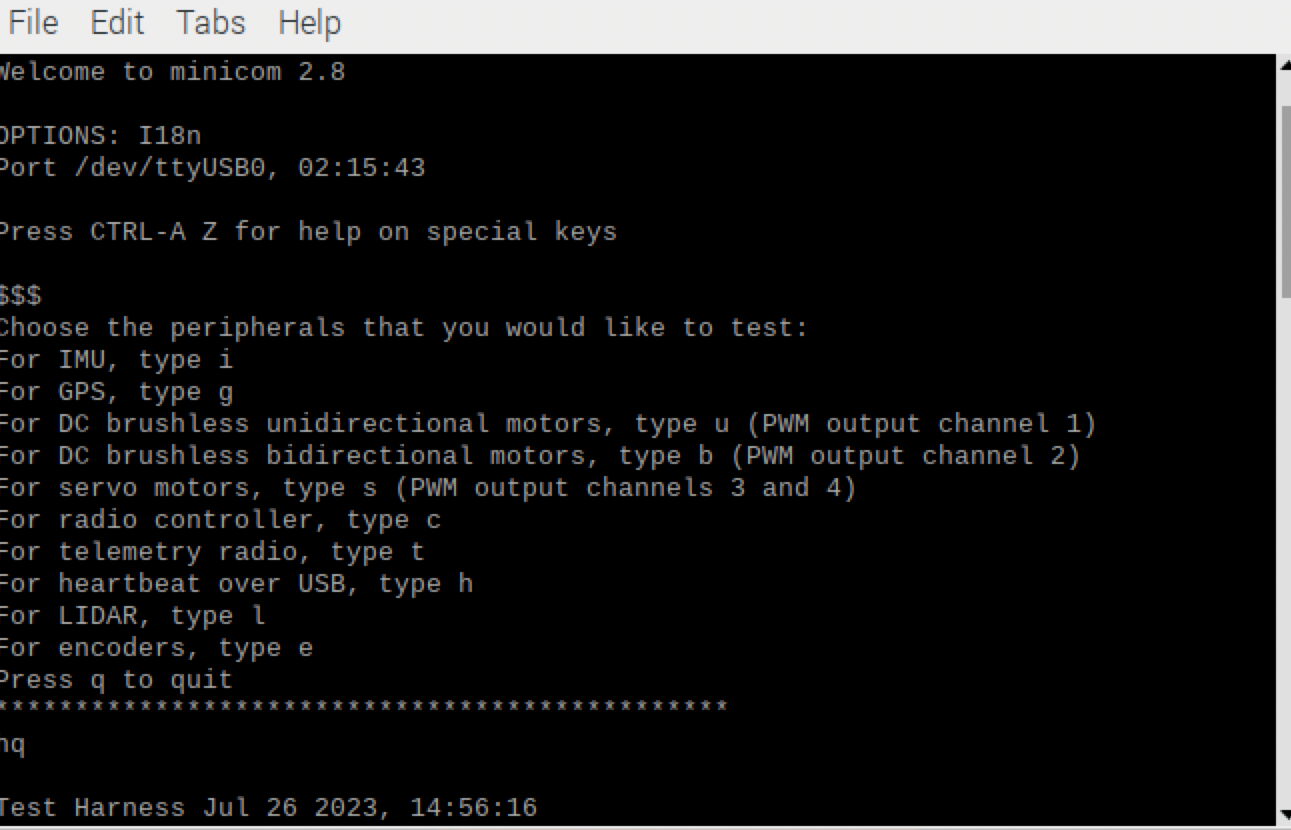
- minicom -b 115200 -o -D /dev/ttyUSB0
- Press Ctrl-A Z to get the Mincom Command Summary dialog
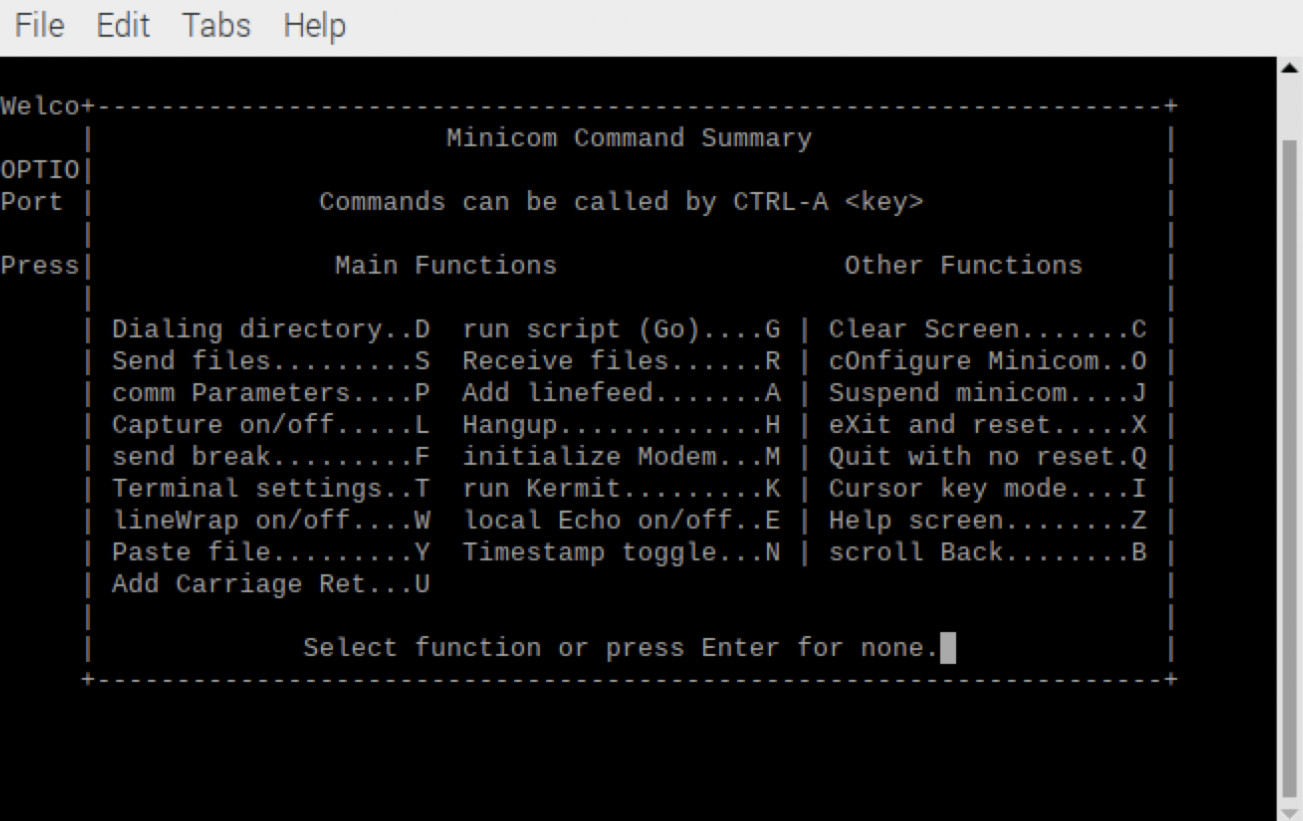
- Press o to Configure Minicom
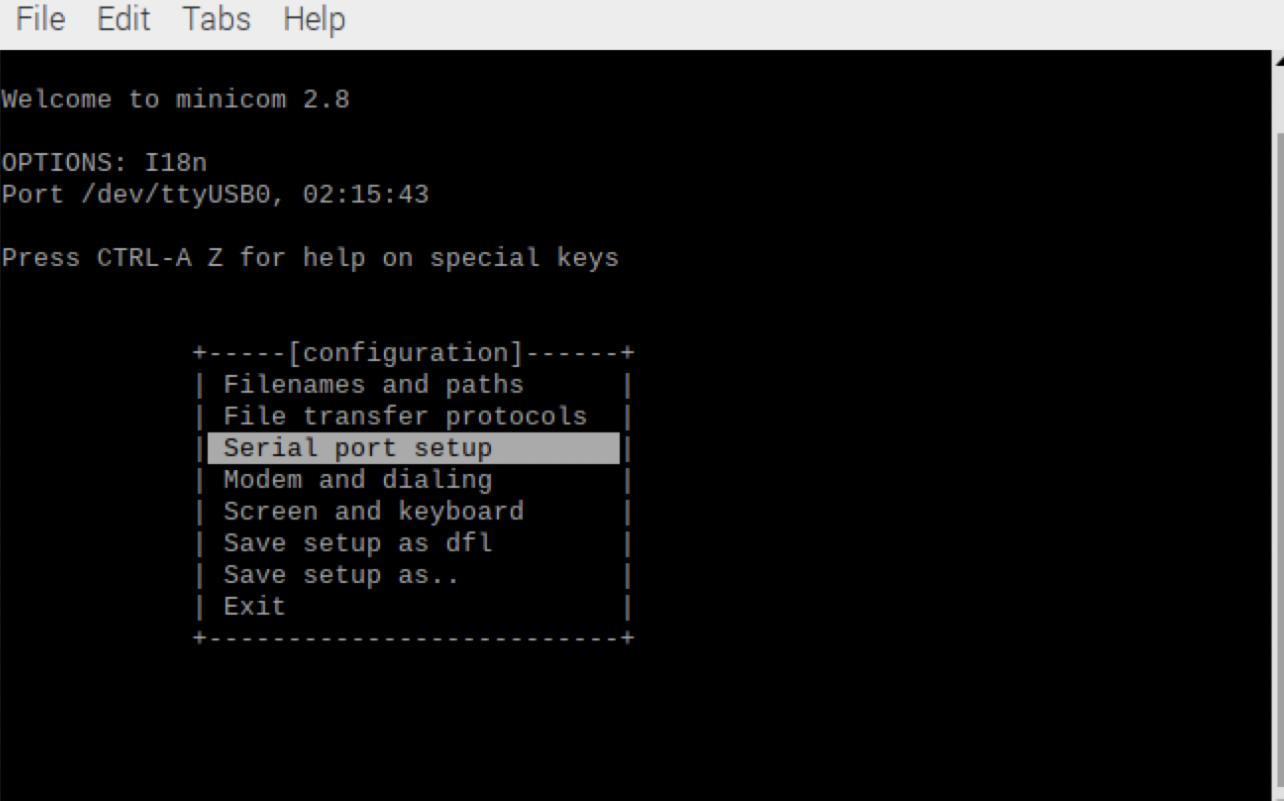
- Select Serial port setup
- press F to set F - Hardware Flow Control : No
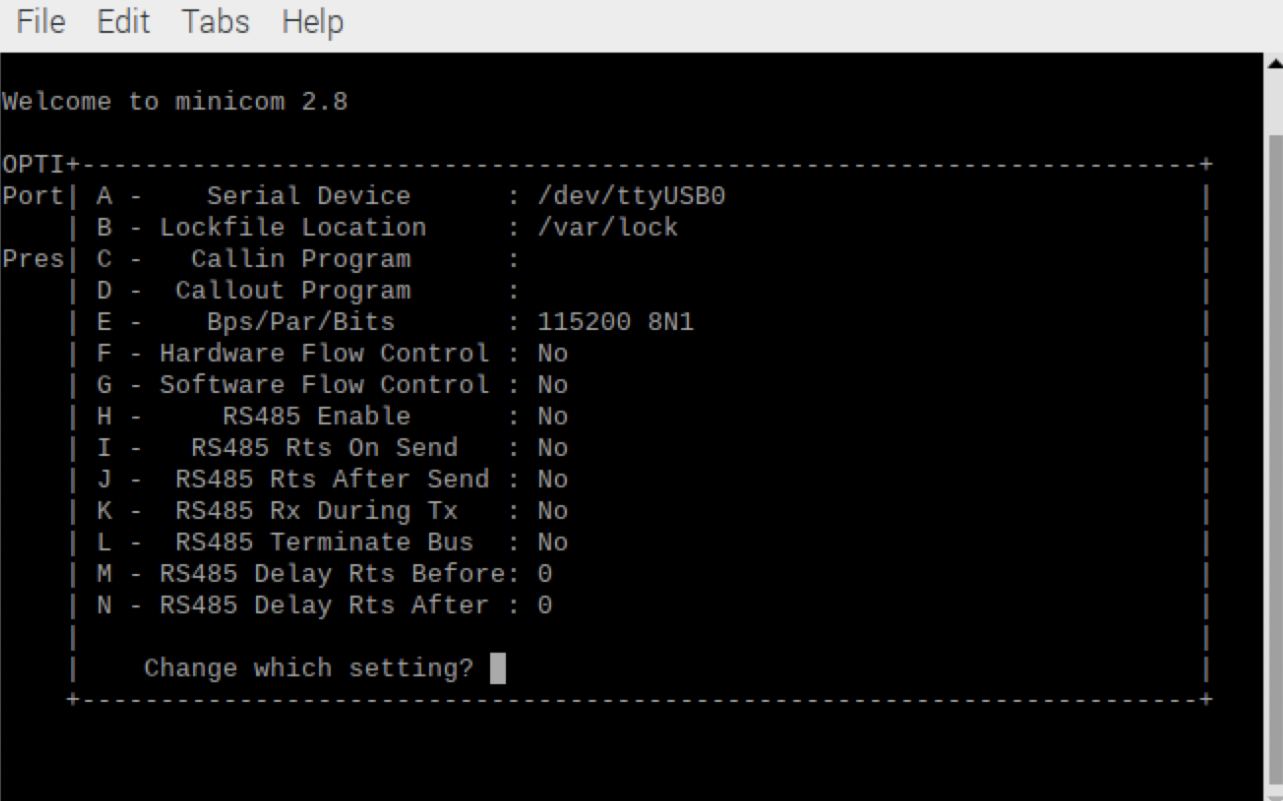
- Save by pressing Enter and exit the Minicom Command Summary
- Click on the OSAVC’s reset button
- Press h to transmit a Mavlink heartbeat message from the OSAVC to the Raspberry Pi 4 and then press q to quit
- Create a new terminal tab, delete the Minicom terminal tab
- In the new terminal, enter
sh
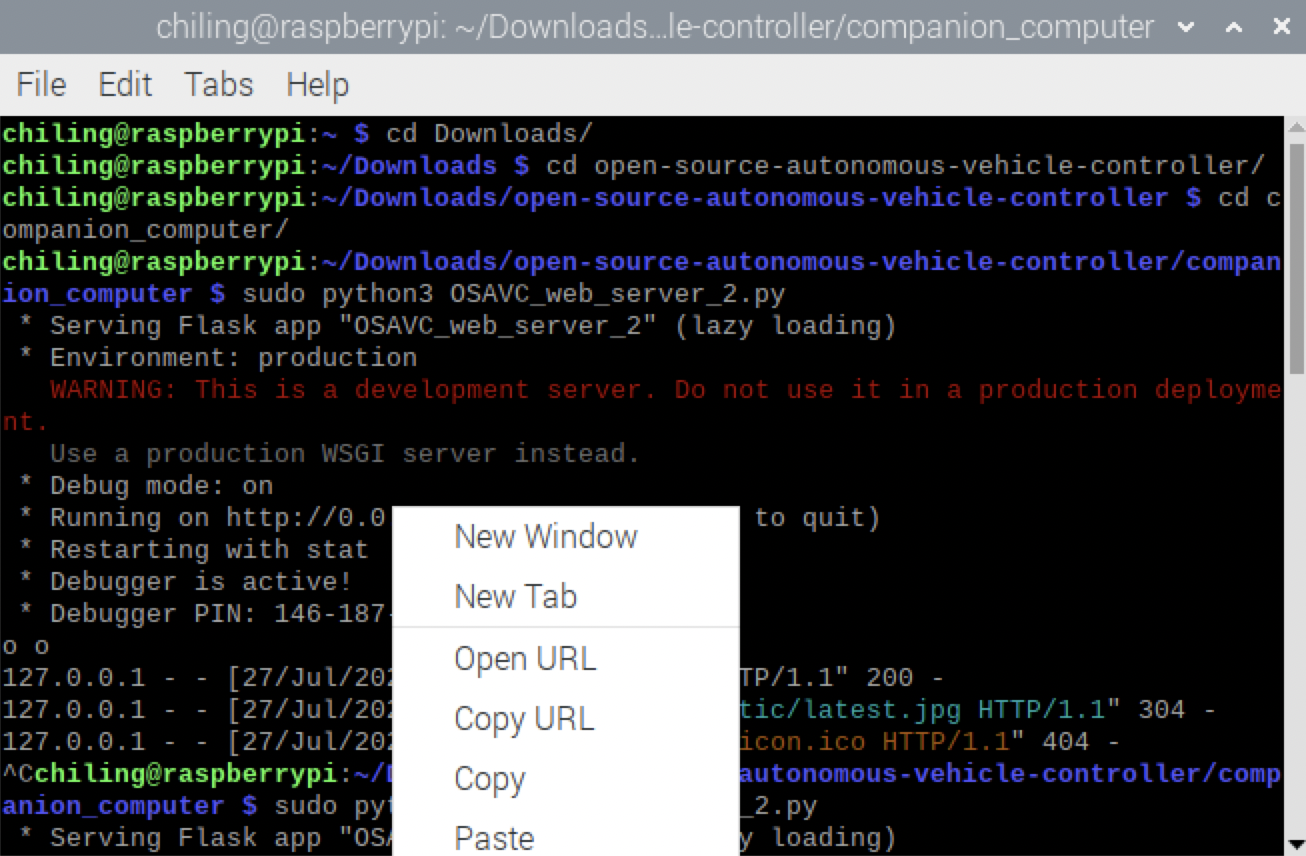
git clone https://github.com/uccross/open-source-autonomous-vehicle-controller.gitsh
cd open-source-autonomous-vehicle-controllersh
cd companion-computersh
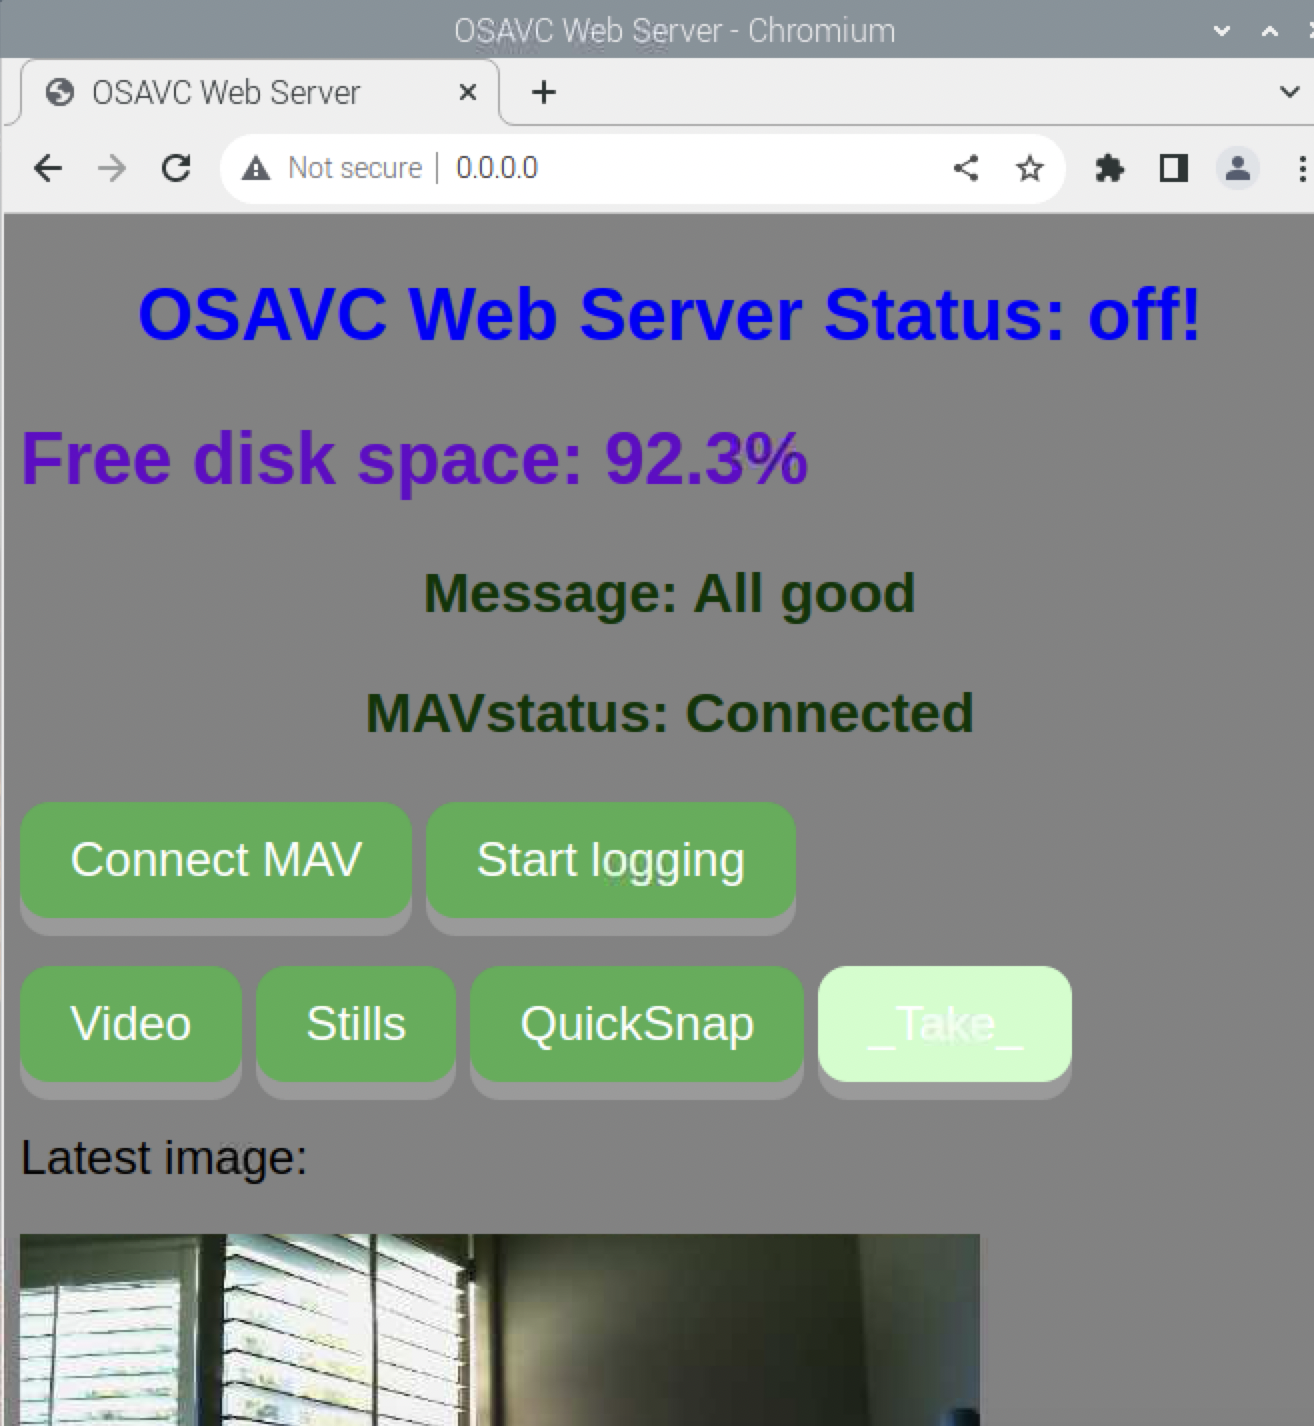
sudo python3 OSAVC_web_server_rpi.py- Open http://0.0.0.0:80/ in Chromium by right clicking the link and clicking Open URL.
- A webpage like this should appear
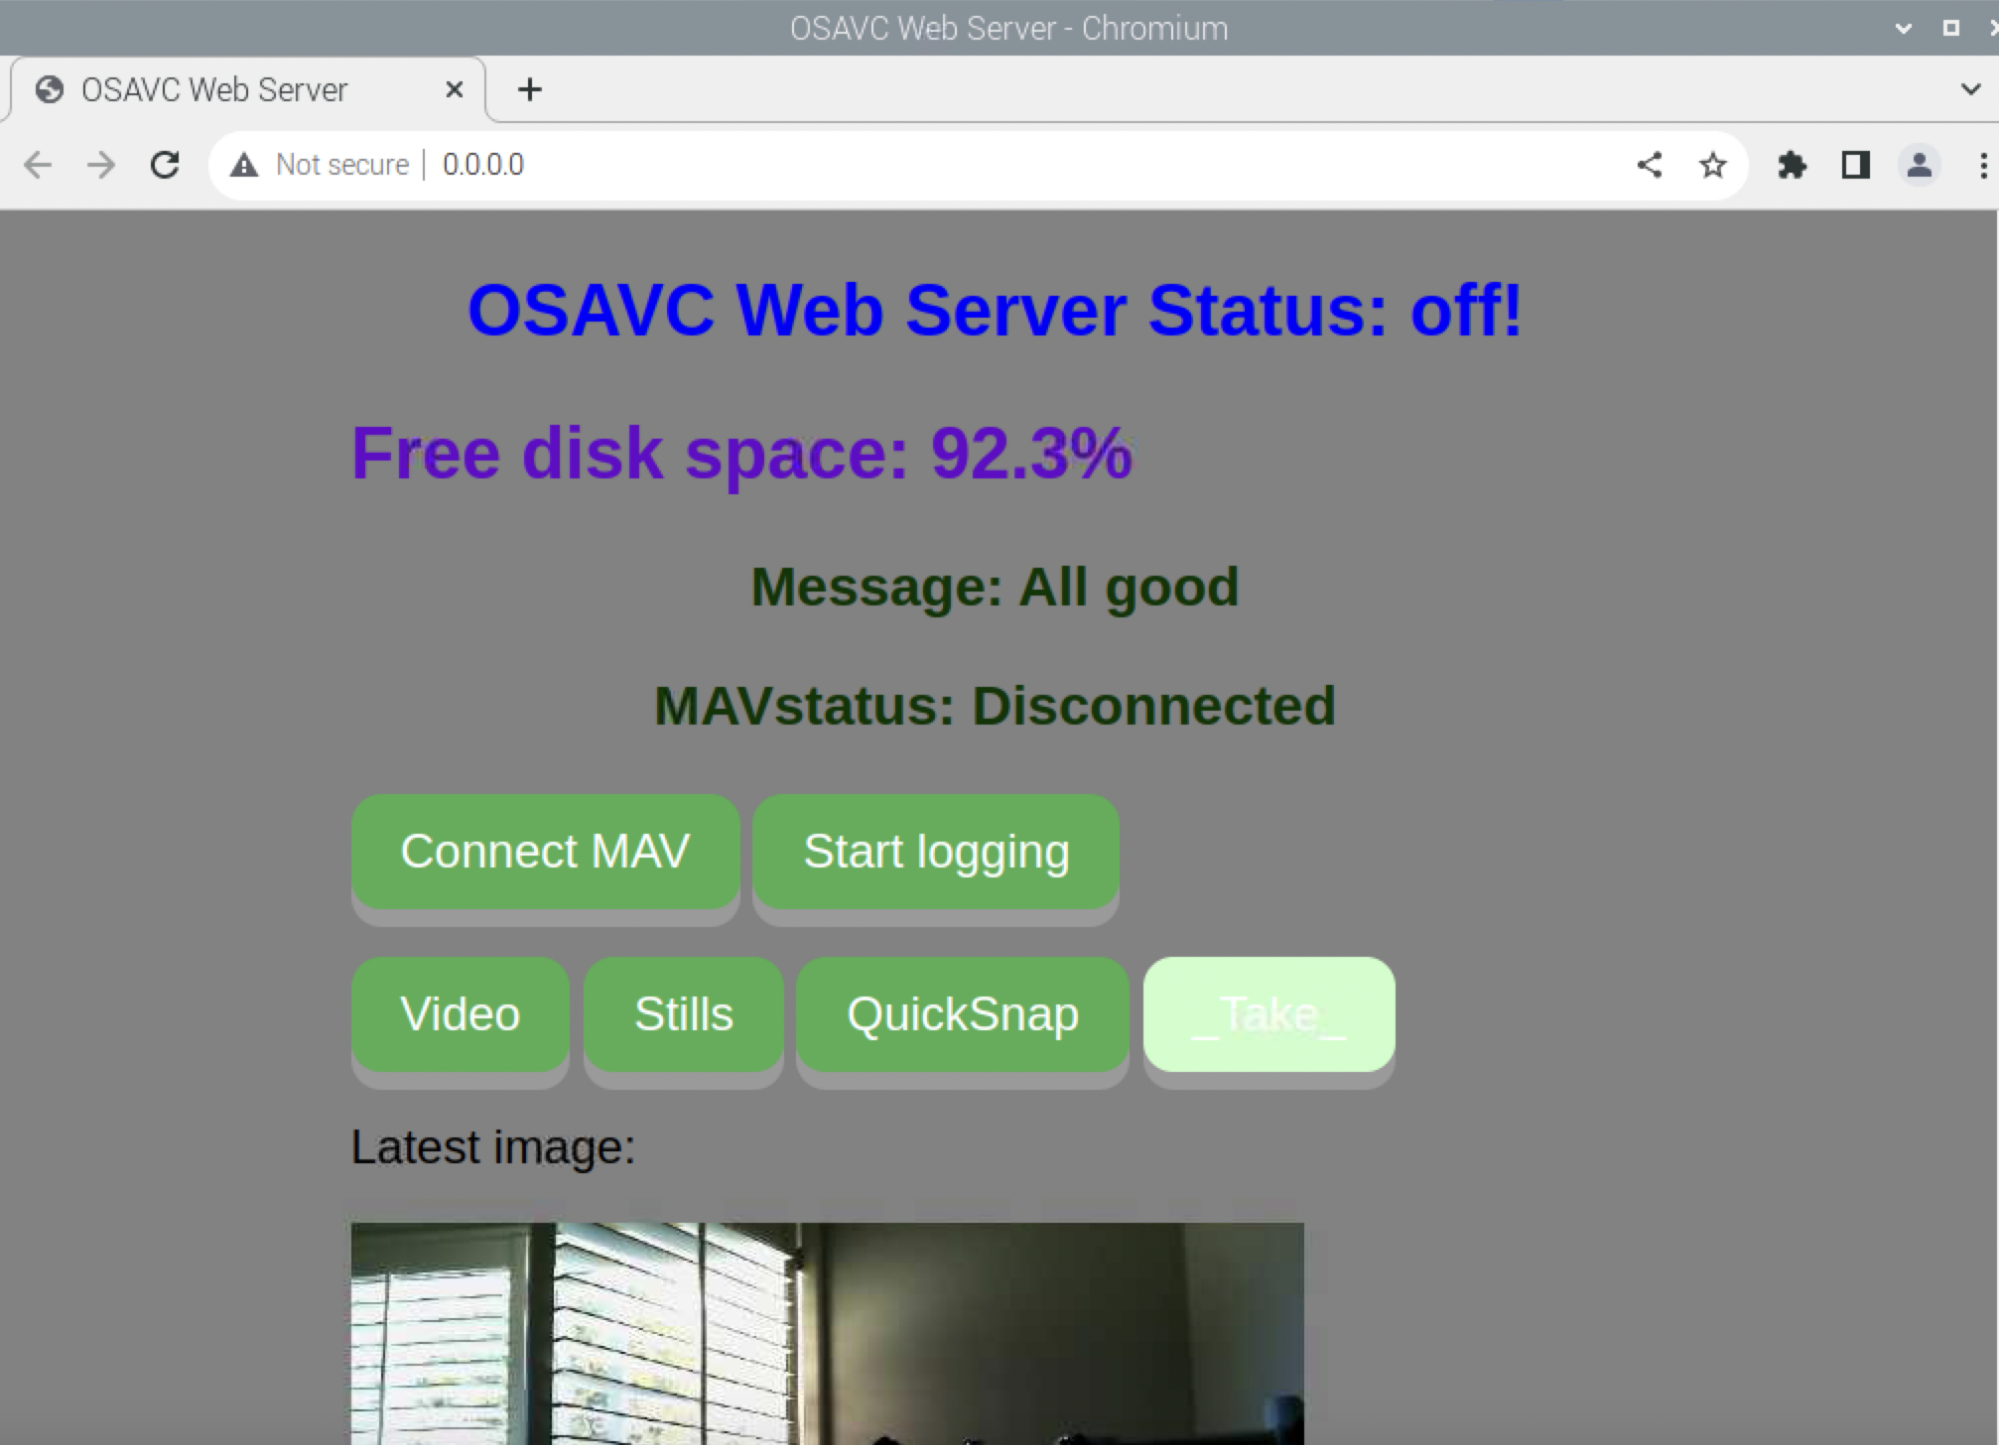
- Click the Connect Mav button
- The button should turn red
- The terminal should output target_system 1, target component 0
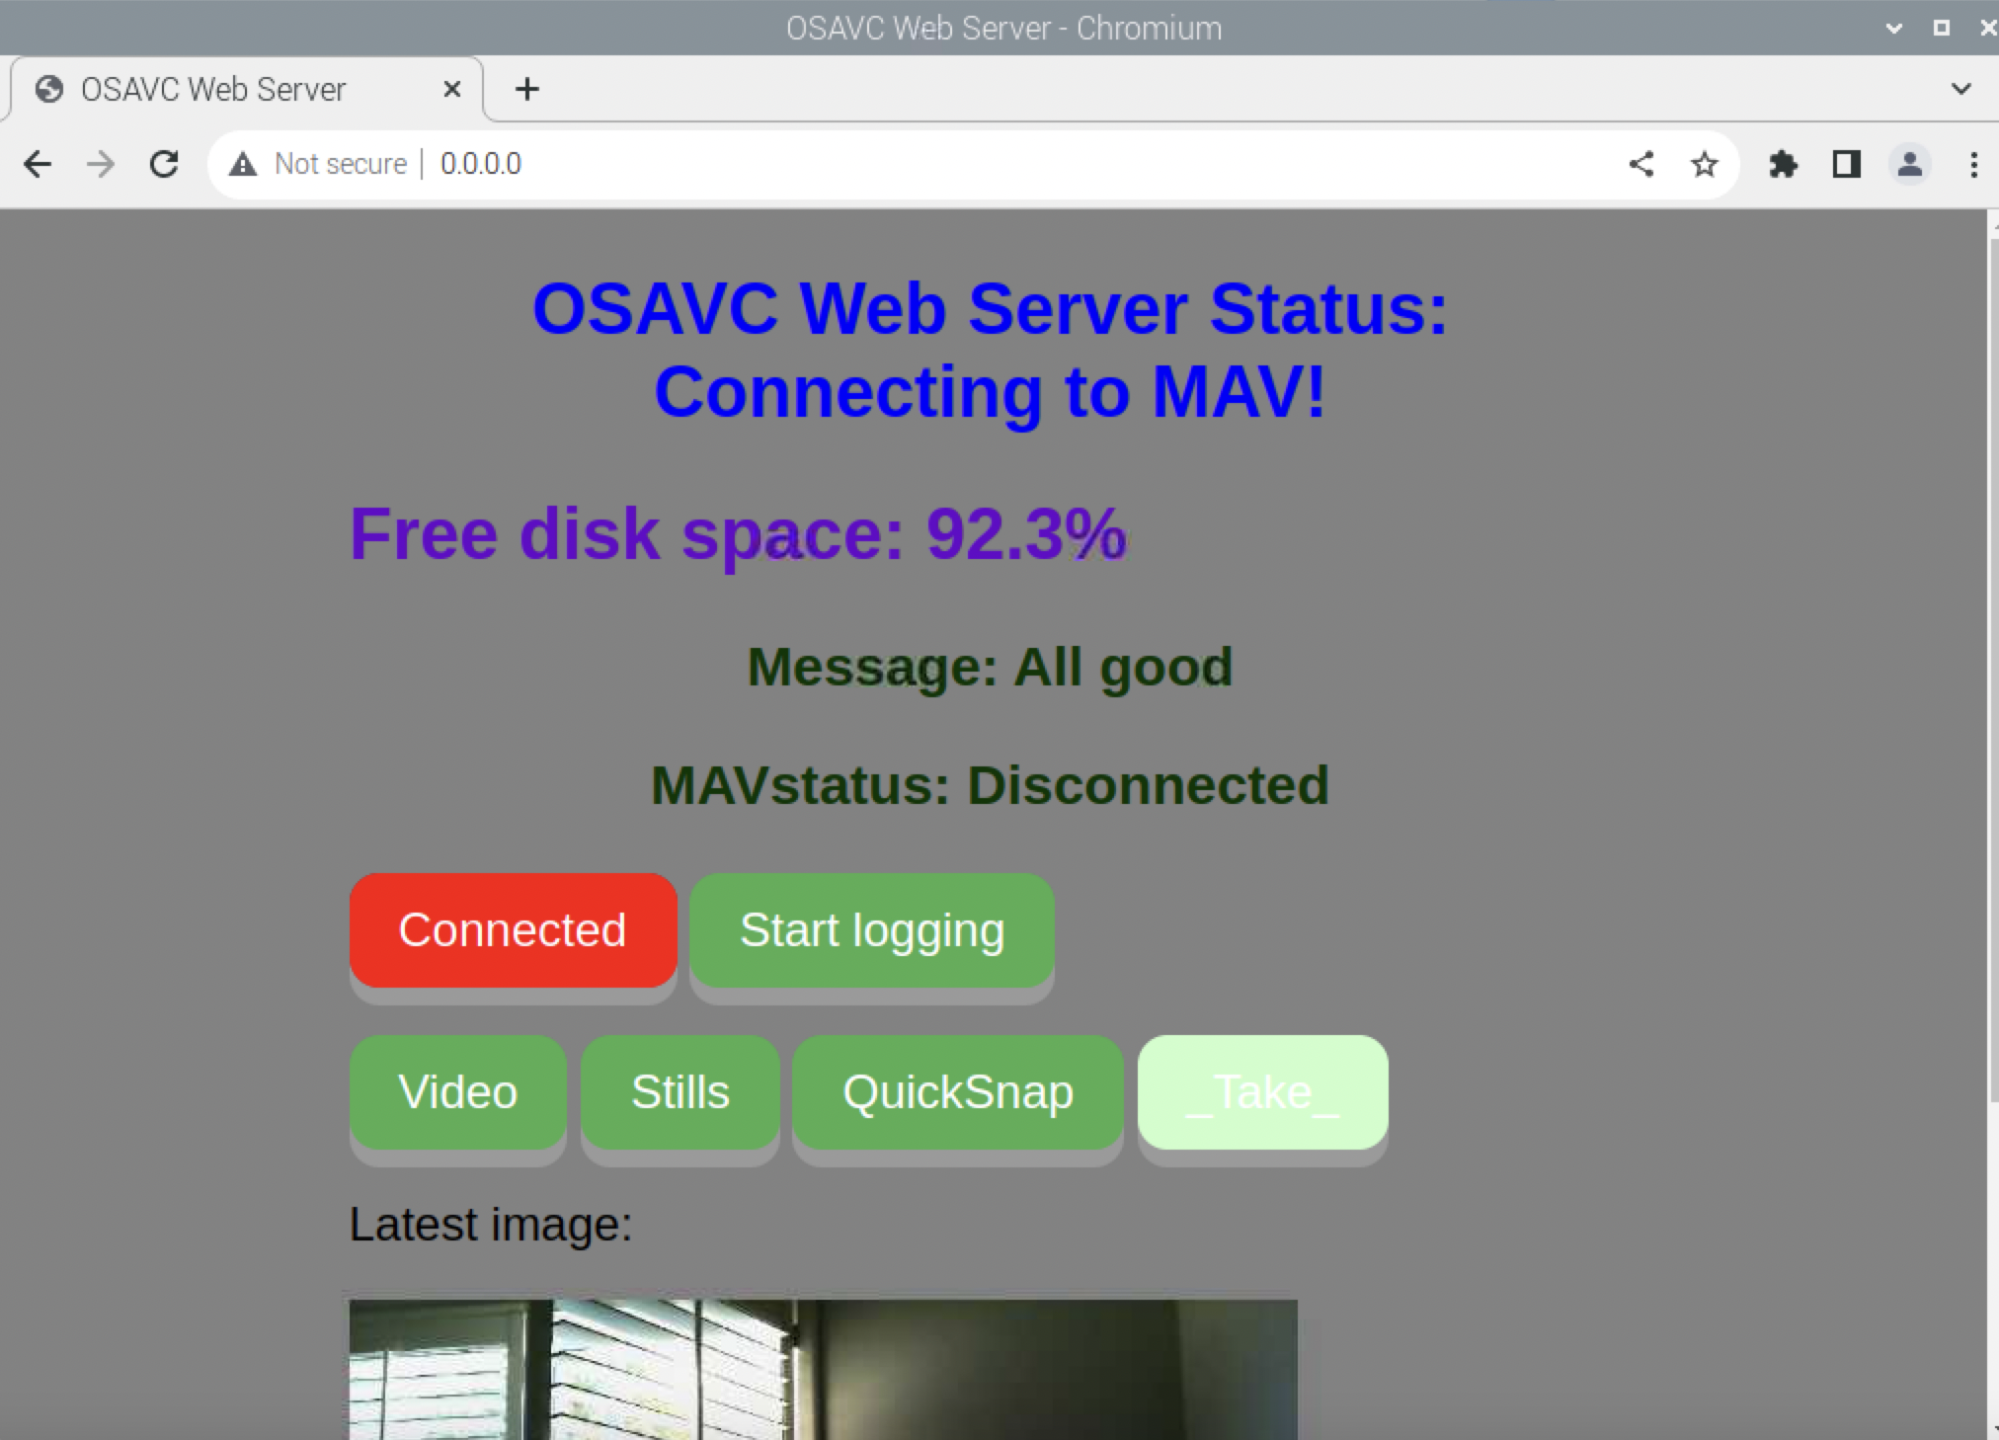
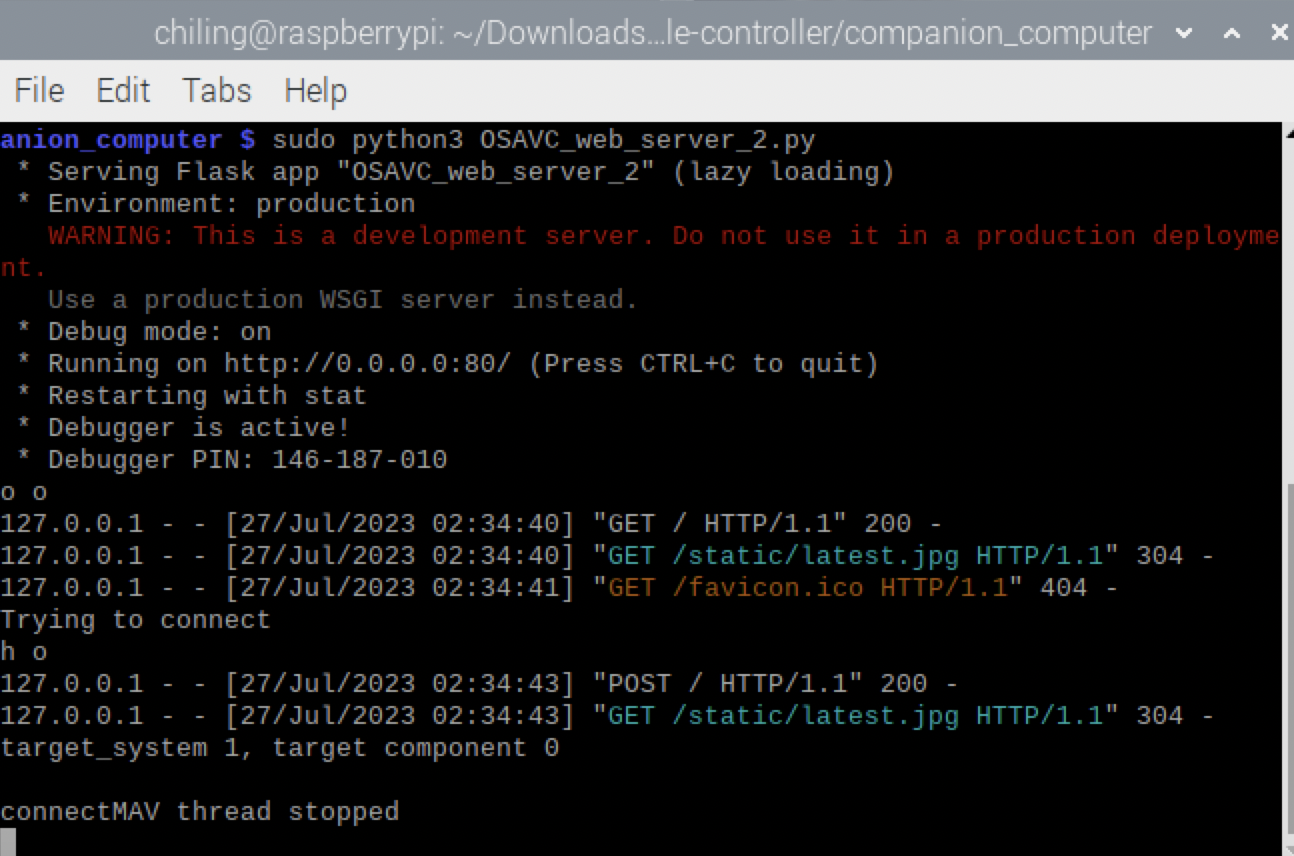
- Finally, click the Connected button again, and the MAVstatus should become Connected