Building Your First Project
Cloning the Repository
To clone the Repo just execute the following command on Gitbash or your terminal prompt. We are making the project folder in Desktop you can clone it into directory you want. Navigate to your desired directory
cd Desktopgit clone https://github.com/uccross/open-source-autonomous-vehicle-controller.gitNow navigate to the modules directory in the Cloned Repo
cd open-source-autonomous-vehicle-controller/modulesClone the submodules in this directory
git clone https://github.com/mavlink/c_library_v2Setting up Hardware
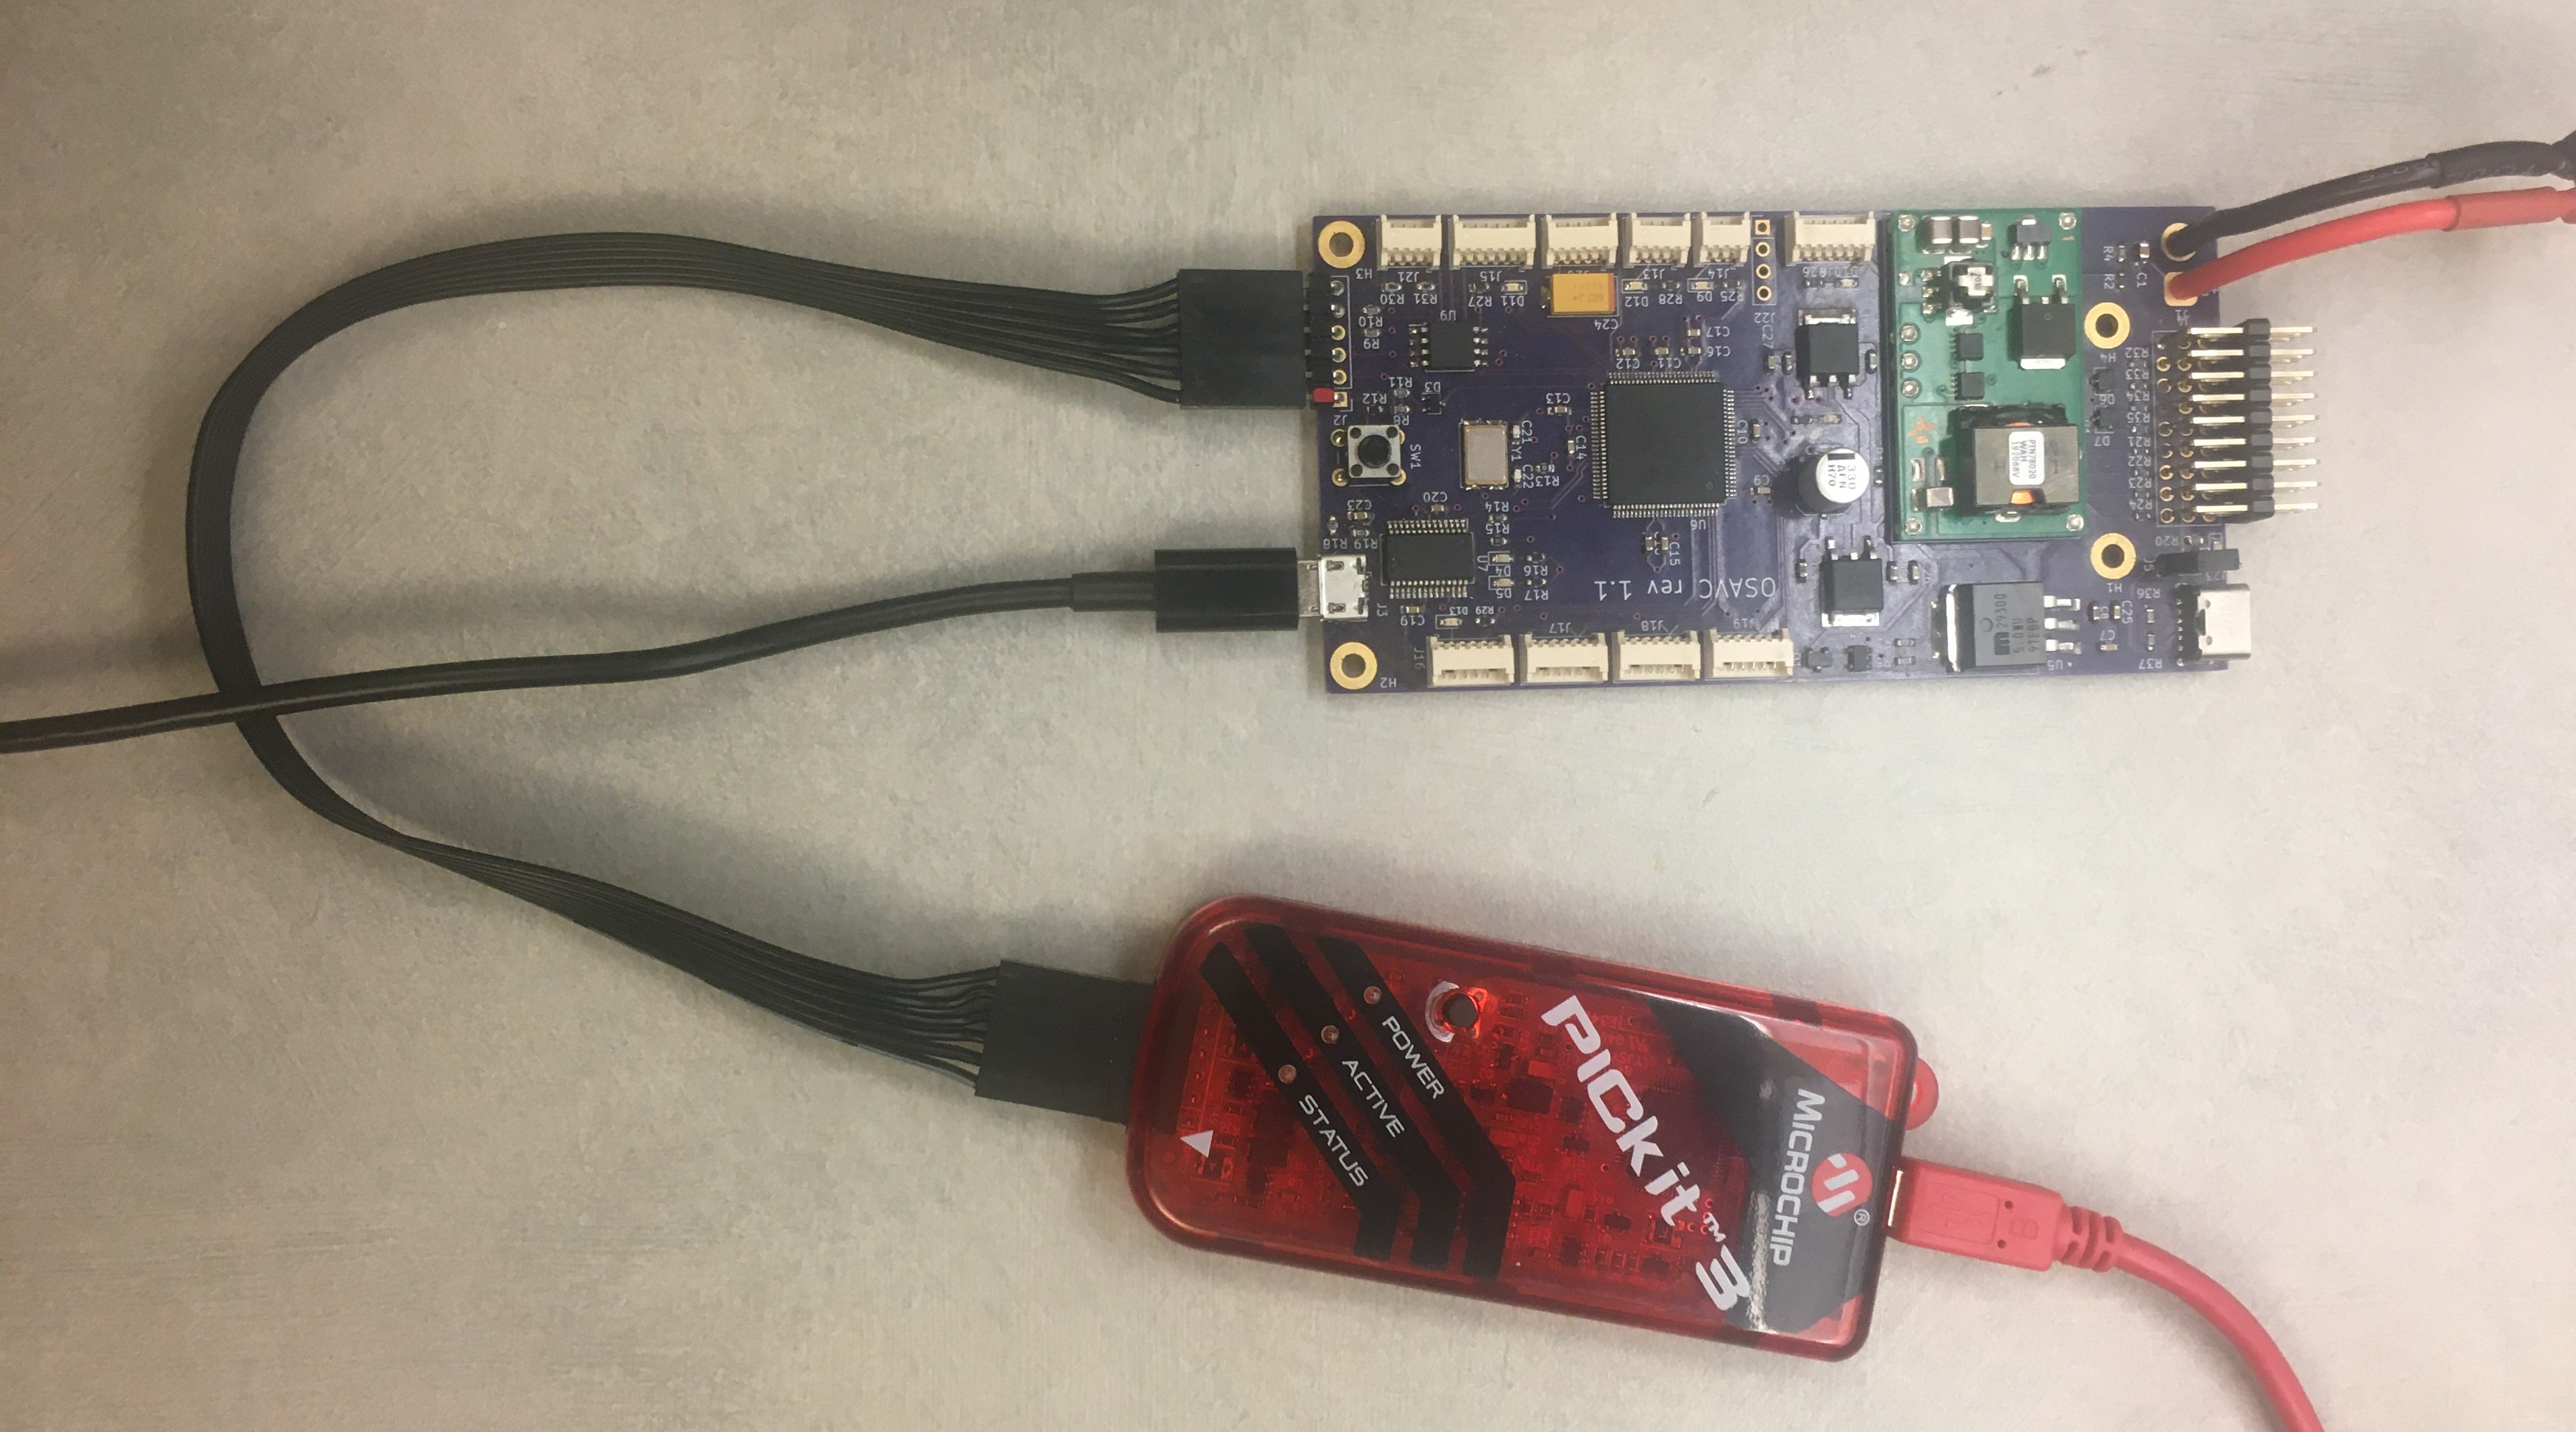
- Connect ICSP (in circuit serial programming) of PICKIT 3 to the OSAVC
- Use a mini USB-b cable to connect the PICKIT 3 to your computer
- Use a micro USB cable to connect the OSAVC to your computer for power and a communications port
Setting up Serial Terminal (CoolTerm / mobaxterm / putty)
Open CoolTerm after connecting your PC to the OSAVC
Choose the port at the bottom left of the application as usbserial
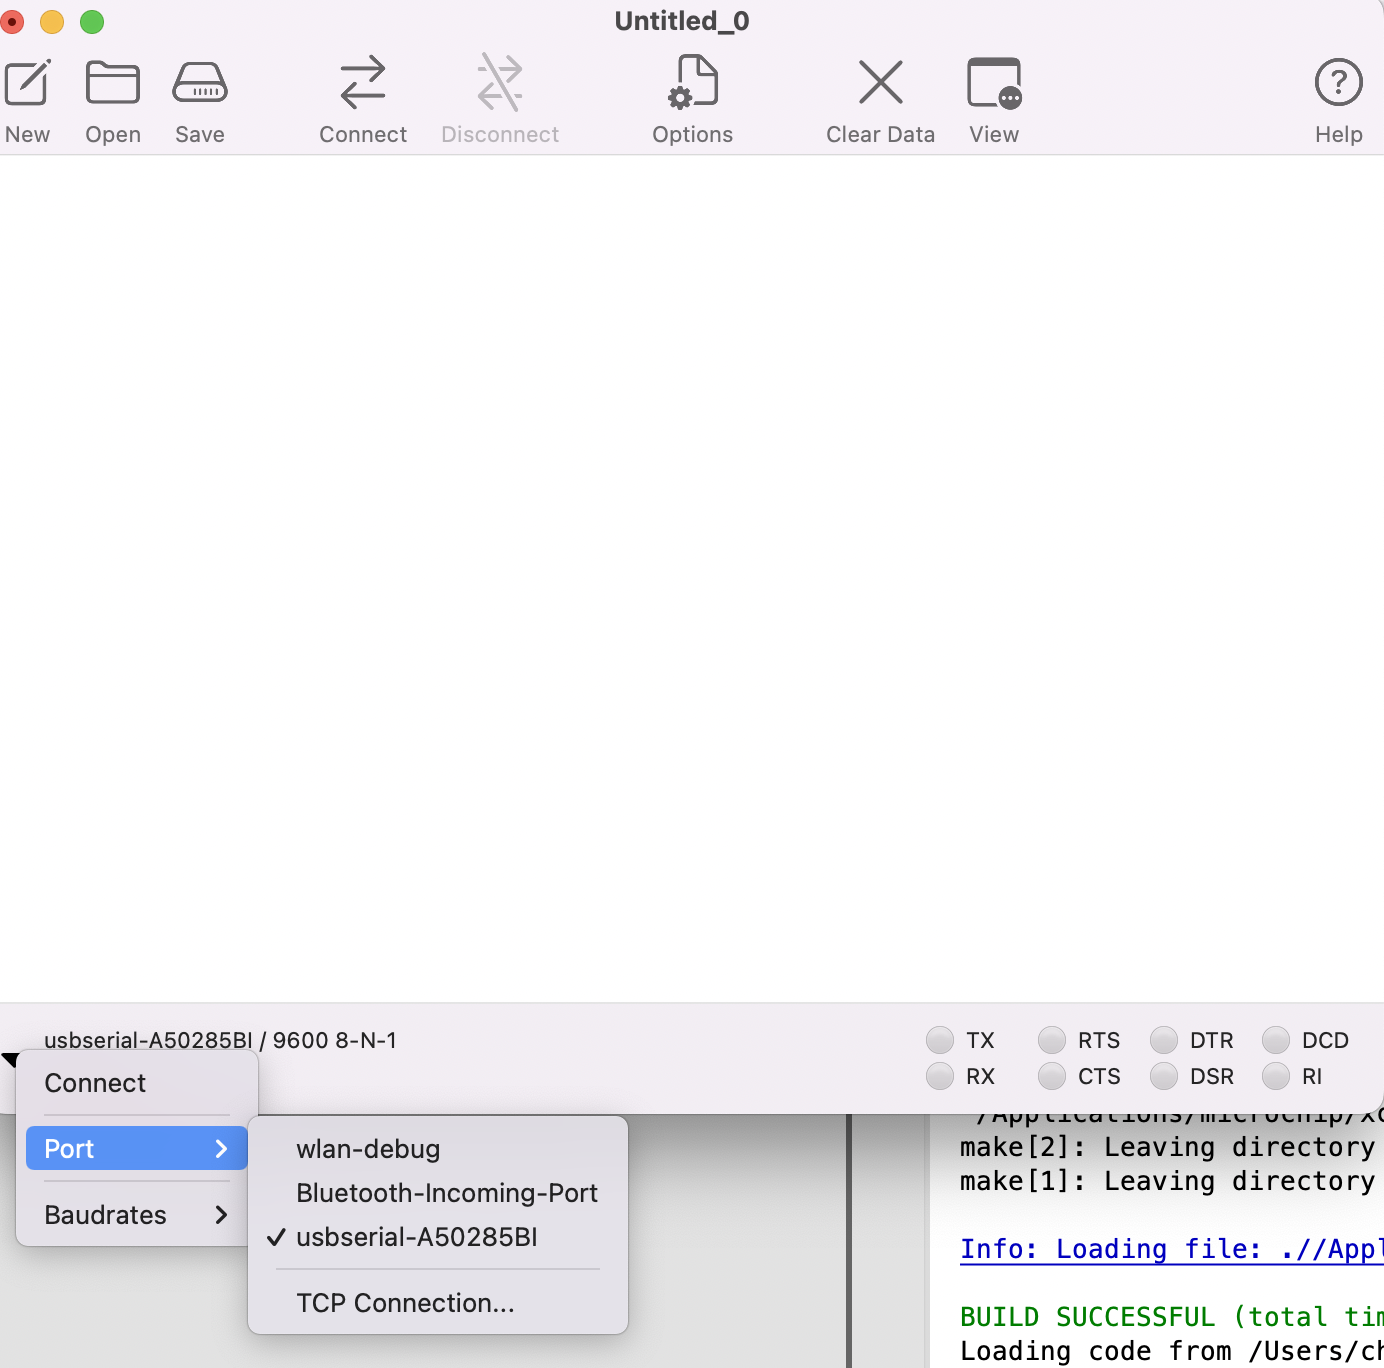
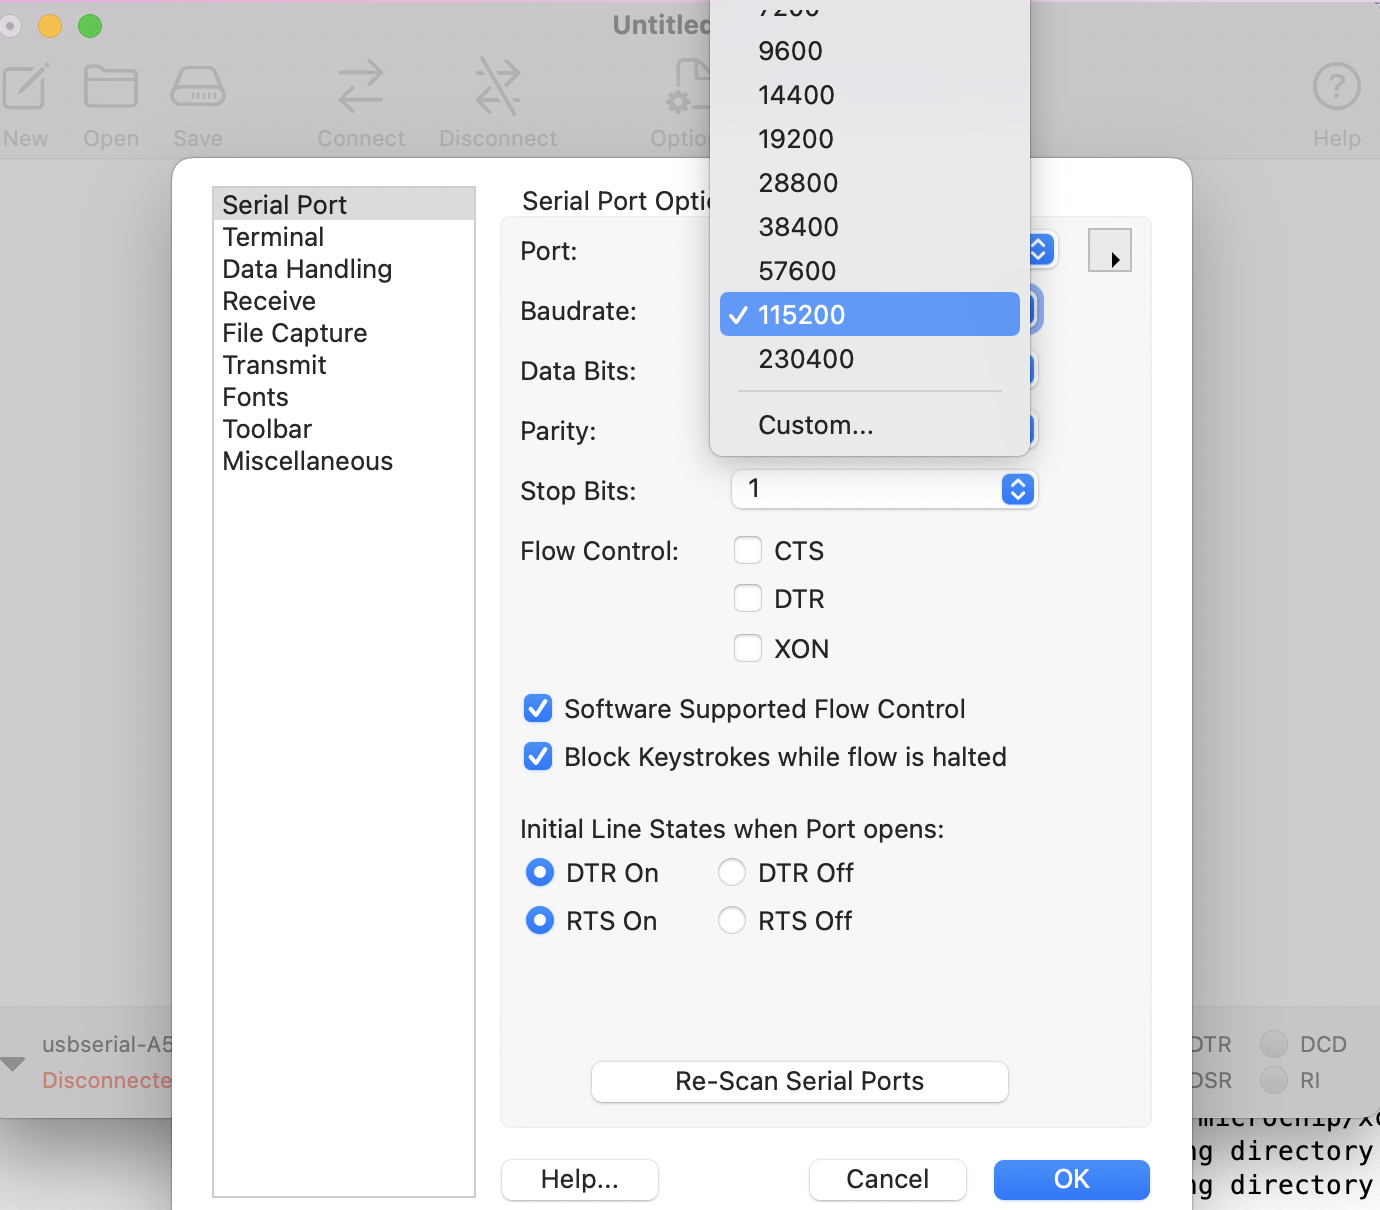
Click Options -> Select 115200 as the baud rate -> Click OK to save
Click Connect at the top of the application
Setting up the MPLAB X
Follow the below given setps for running Serial.X
File -> Open Project
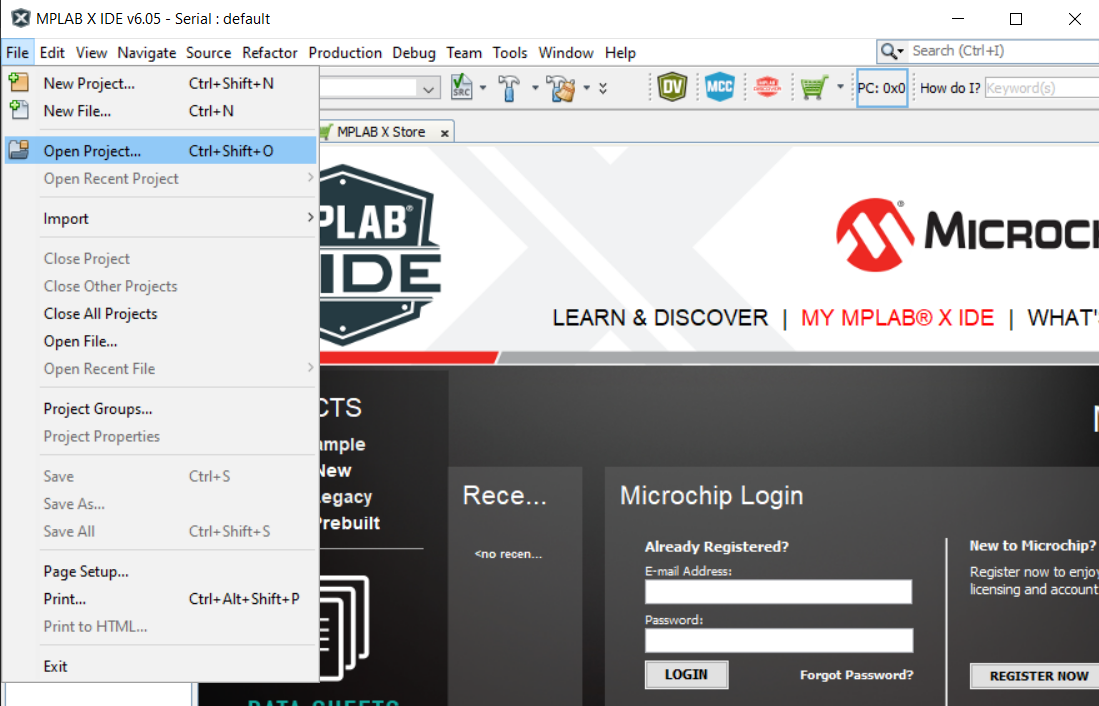
Now navigate to -> open-source-autonomous-vehicle-controller -> lib -> Serial.X you would be able to see the below window with the serial project open
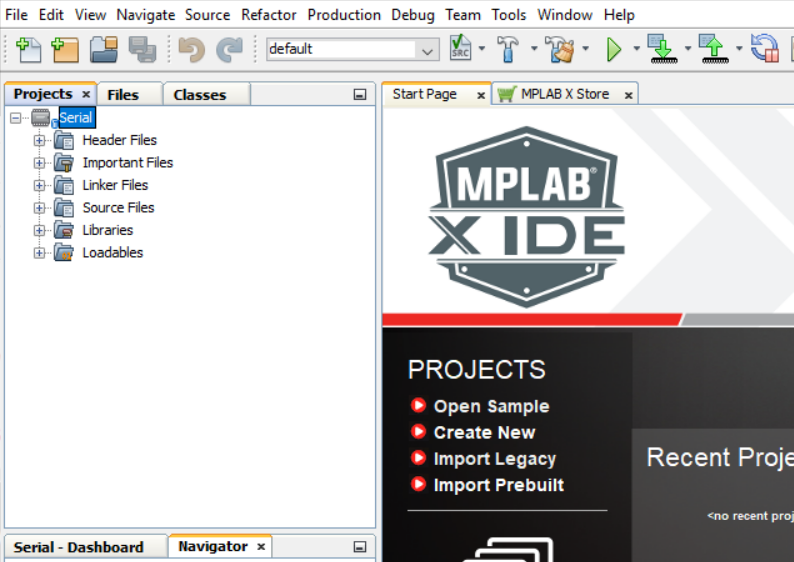
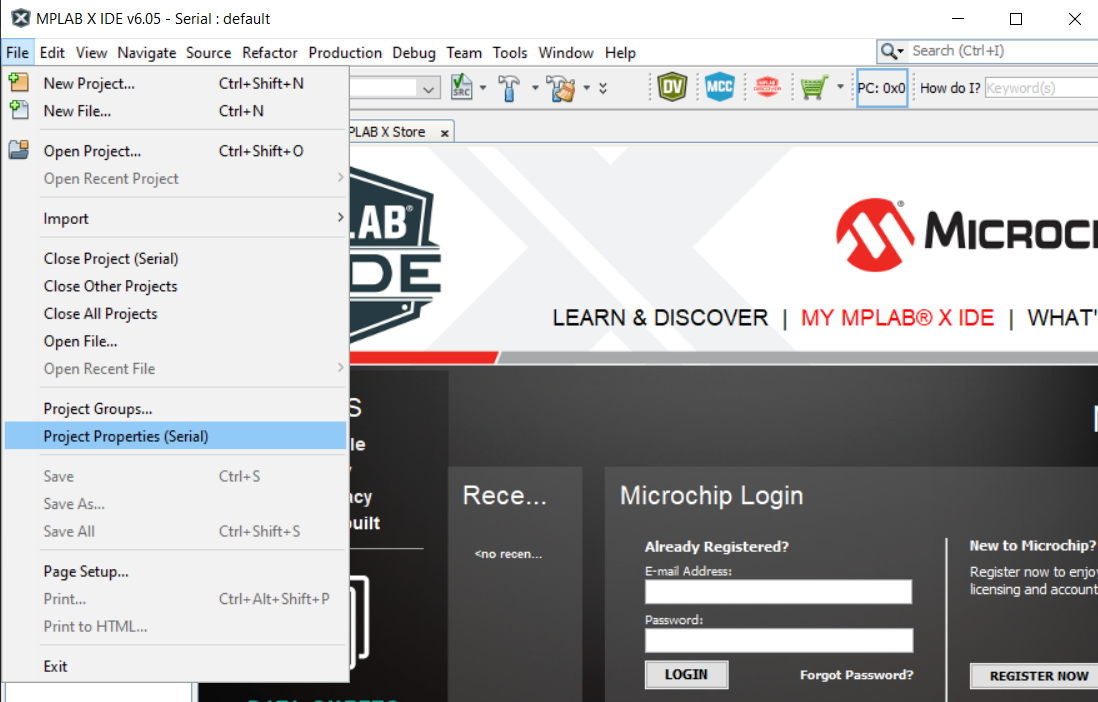
Now Open Serial.X Project Properties (File -> Project Properties)
Choose Connected Hardware Tool to PICkit3
Navigate to xc32-ld
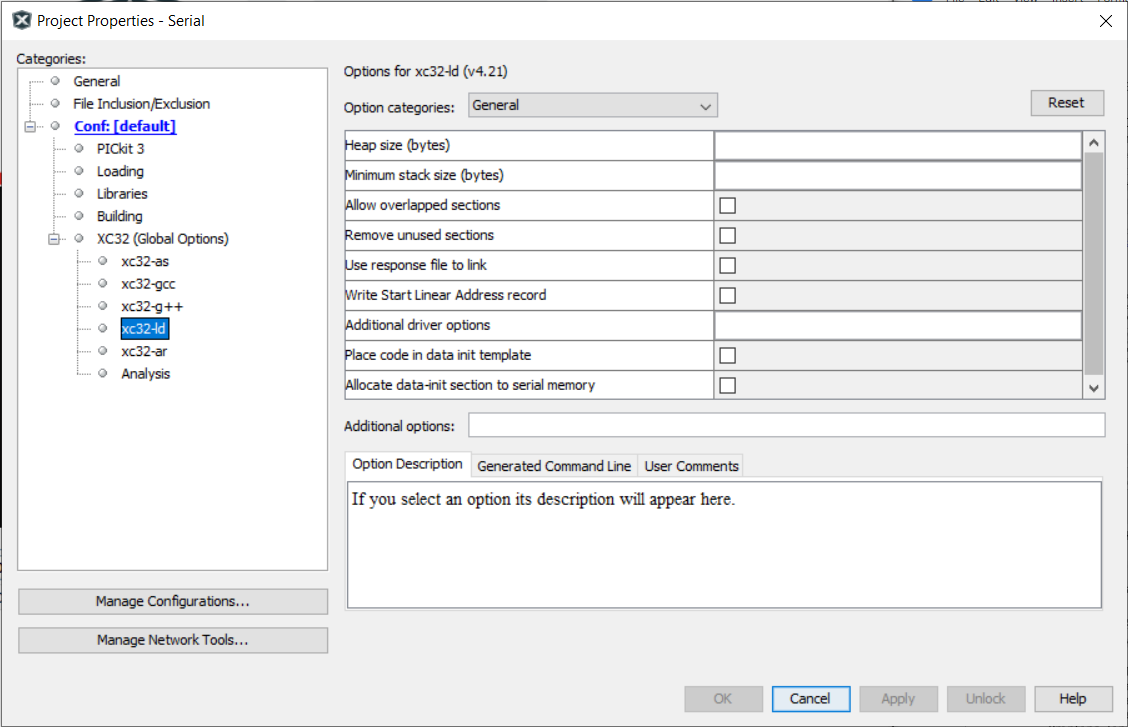
Choose General as the option category
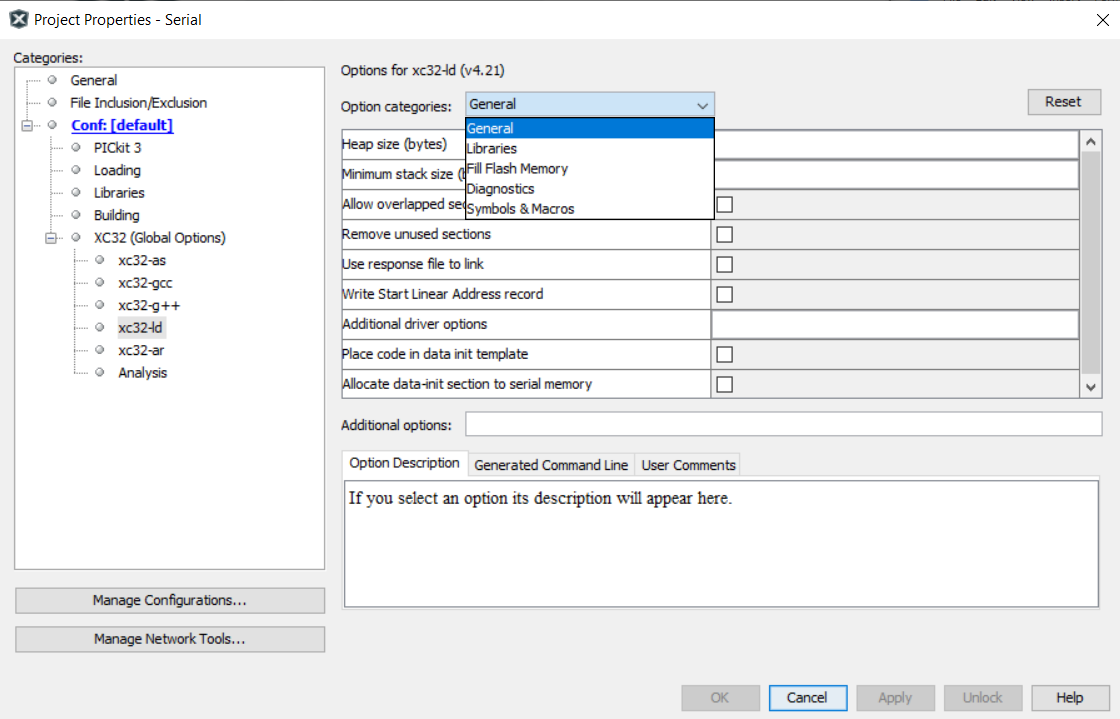
set the Heap Size (bytes) to be 8000 bytes
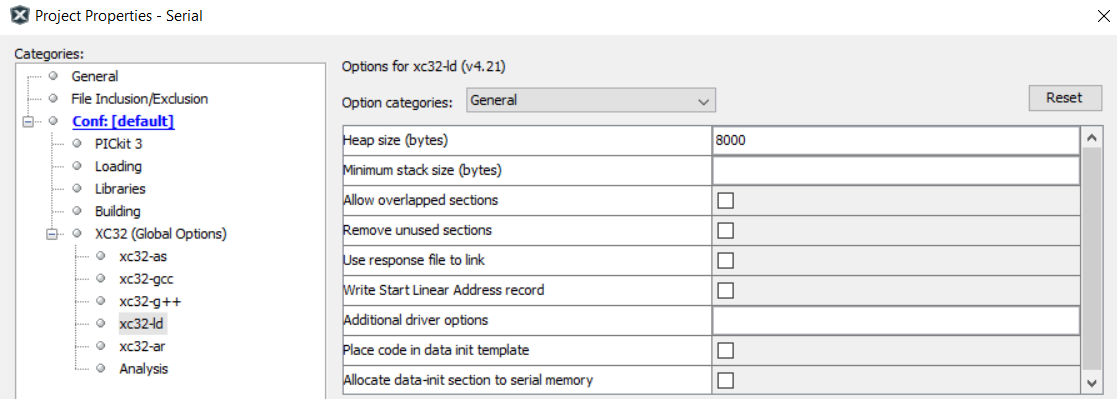
Click OK to save the modified Project Properties

Click Clean and Build

Click Make and Program Device

Open your preset serial terminal application (CoolTerm)
Output should be: 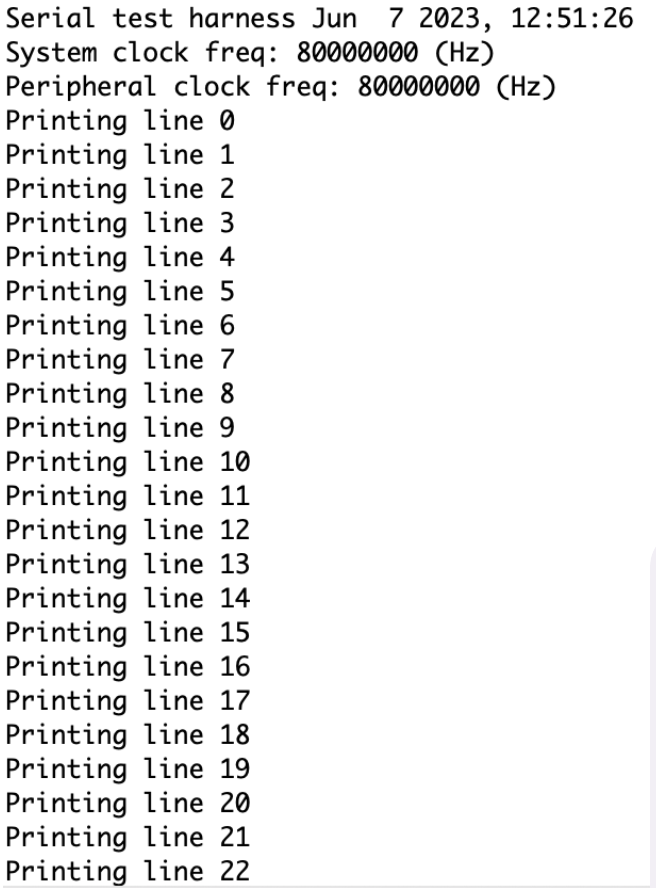
Try typing something and press Enter

What you type should now stay in the serial terminal